
This top is an easy way to use up a bunch of scraps, random charm packs, and random 2 1/2″ strips. Bonus points for being a good first practice quilt for free motion quilting since it gave me specific areas to fill. Sure, I could have just meandered all over the top but since I had so many discreet, defined areas, why not make goals for each little space and practice specific shapes each time?
I thought about writing up a pattern for this quilt top but this is a little more free wheelin’ and you almost don’t need instructions for it. (I *do* have patterns at my etsy shop: https://www.etsy.com/shop/MateriellaDesigns/ so please go check them out! Thanks!)
Collect your 5″ squares and 2 1/2″ accent fabric strips of various lengths that you think would make a fun scrap quilt. If you have a long 2 1/2″ strip that runs selvedge to selvedge (Width of Fabric, approx. 41″), you can simply start feeding it right side up through your sewing machine and line up 5″ squares with its edge, right sides together. Use your typical scant 1/4″ seam allowance. The dashed line here indicates your seam. You’ll be able to get seven or eight squares along a full 2 1/2″ X WOF strip depending how close you squeeze them together. The arrow indicates the end that first feeds into your sewing machine (word press doesn’t let me put it in vertical orientation and then type to the right side of it, or at least I haven’t figured that out…)

If you also use some 2 1/2″ scraps that aren’t full WOF, you can either trim them to 5″ lengths or just wing it, sewing the 5″ squares onto 2 1/2″ pieces as you go. Carefully cut these units apart, then trim as needed to 5″ wide by 7″ tall:

I then put these units in columns on a design wall but if you don’t have that kind of space, you may just be able to work column by column. Generally speaking I did columns of darks on the right and left sides with some exceptions and then the 2 1/2″ accent pieces (shown here in purple and orange) were staggered horizontally across the quilt, left to right:
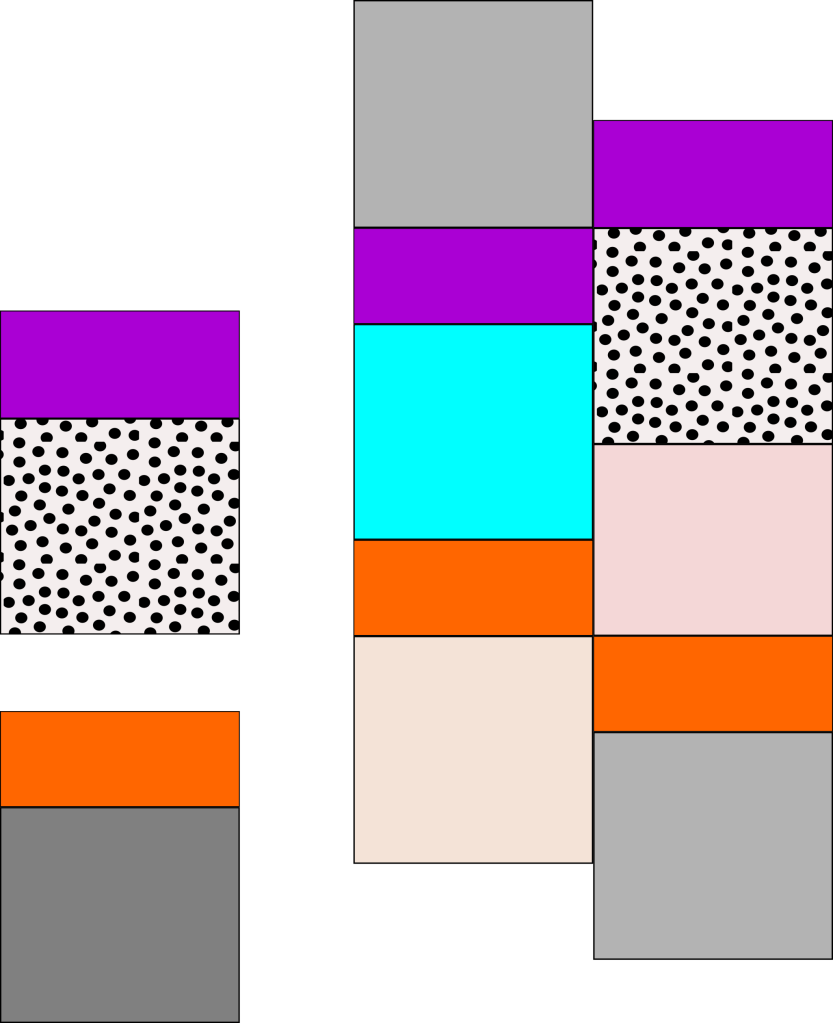
When you want the accent pieces that run left to right to change direction, there are a couple of ways of doing that. One is to use a 4 1/2″ tall by 5″ wide rectangle as pictured above in the very right hand column immediately below the polka dot square. It’s not another 5″ square because of quilt math (seam allowances and etc…) This sends the accent fabric back the other direction.
Another “switch” that you can do is to split the accent rows by sewing a 2 1/2″ by 5″ piece that blends with your 5″ square fabrics to a 2 1/2″ accent fabric. Place that unit in a column to split the accent fabric as pictured on the right side:

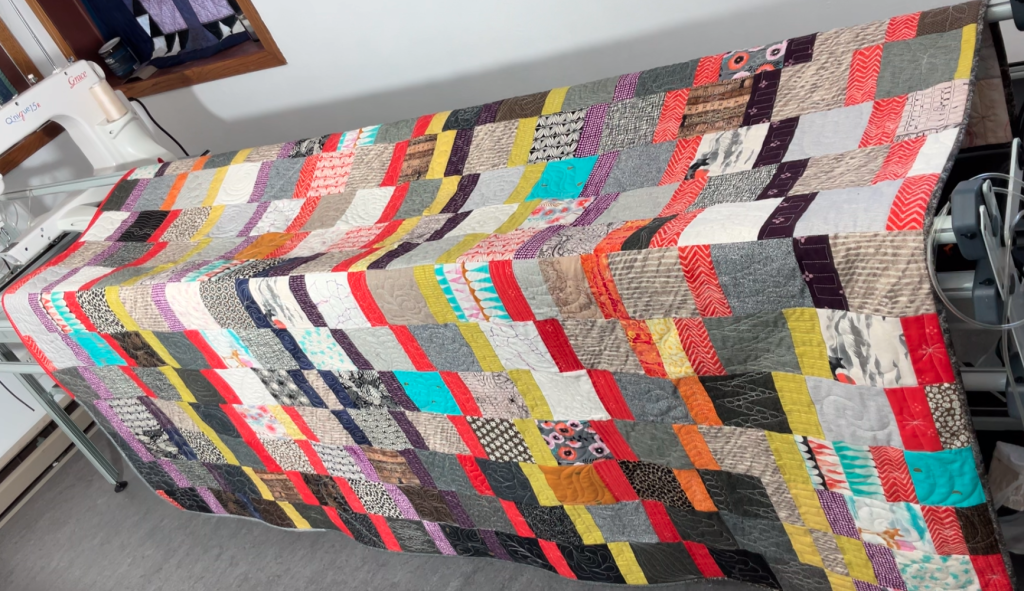
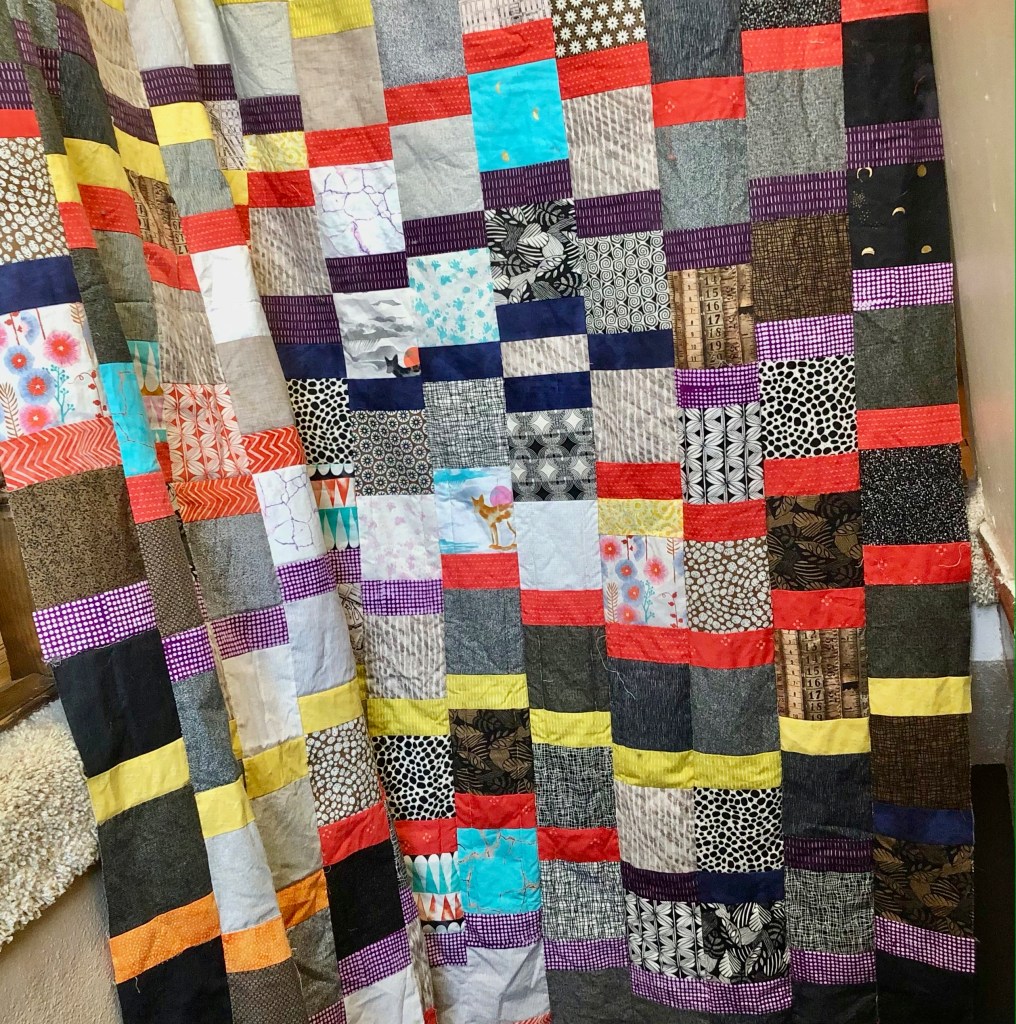
Here’s a photo of my top/flimsy before I quilted it. Note on the lower right side I simply kept the accent fabric straight from one column to the next instead of staggering it which also meant the background fabrics were parallel in a few rows there. If you look around the top in general, you’ll see some spots where I threw in a 2 1/2″ accent piece just to “move” the accent lines. Most of my accent colors are orange, red, yellow, and purple but I had some navy/dark purplish strips I threw in. I kept some of my accent fabric lines short, possibly because I just didn’t have enough of that fabric! Also, changing the lengths of the accent lines creates a little more interest in the top or changing the accent color part way across the top. If you would prefer a more regular “wave” of the accent lines from left to right, then go ahead and make that top! I’m sure it will be beautiful!
Once you have your layout and columns figured out, you can simply sew the columns together. I recommend pinning all along these long seams.
Please watch this video to see more of how I used these layout strategies for this quilt top.
So there you have it: basically just sew your 5″ charm pack squares to your 2 1/2″ leftovers from bindings or jelly rolls or because you – like so many of us do – cut your scraps into 2 1/2″ strips. Chop them up and remix them and you’ve done some stash busting! Bonus points for doing some (probably) mindless chain piecing too while listening to a book or “watching” some tv.
Feel free to send questions my way!
