A Materiella Scrap Buster

This top is an easy way to use up a bunch of scraps, random charm packs, and random 2 1/2″ strips. Bonus points for being a good first practice quilt for free motion quilting since it gave me specific areas to fill. Sure, I could have just meandered all over the top but since I had so many discreet, defined areas, why not make goals for each little space and practice specific shapes each time?

I thought about writing up a pattern for this quilt top but this is a little more free wheelin’ and you almost don’t need instructions for it. (I *do* have patterns at my etsy shop: https://www.etsy.com/shop/MateriellaDesigns/ so please go check them out! Thanks!)

Collect your 5″ squares and 2 1/2″ accent fabric strips of various lengths that you think would make a fun scrap quilt. If you have a long 2 1/2″ strip that runs selvedge to selvedge (Width of Fabric, approx. 41″), you can simply start feeding it right side up through your sewing machine and line up 5″ squares with its edge, right sides together. Use your typical scant 1/4″ seam allowance. The dashed line here indicates your seam. You’ll be able to get seven or eight squares along a full 2 1/2″ X WOF strip depending how close you squeeze them together. The arrow indicates the end that first feeds into your sewing machine (word press doesn’t let me put it in vertical orientation and then type to the right side of it, or at least I haven’t figured that out…)

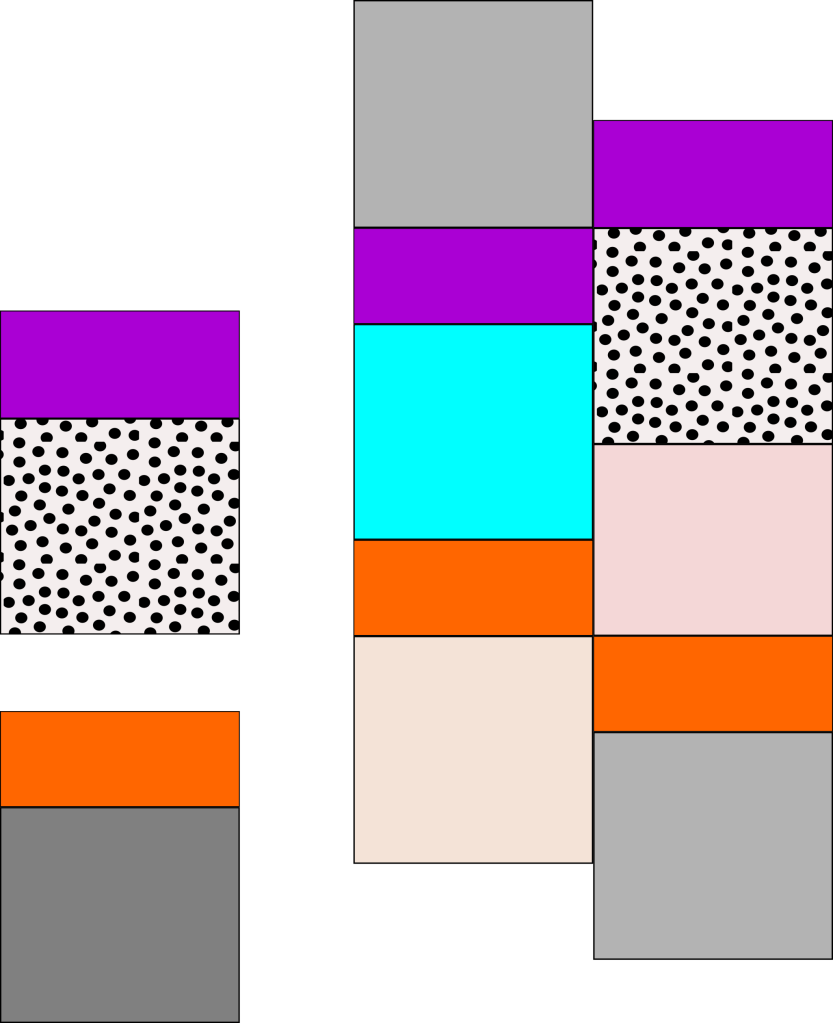
If you also use some 2 1/2″ scraps that aren’t full WOF, you can either trim them to 5″ lengths or just wing it, sewing the 5″ squares onto 2 1/2″ pieces as you go. Carefully cut these units apart, then trim as needed to 5″ wide by 7″ tall:

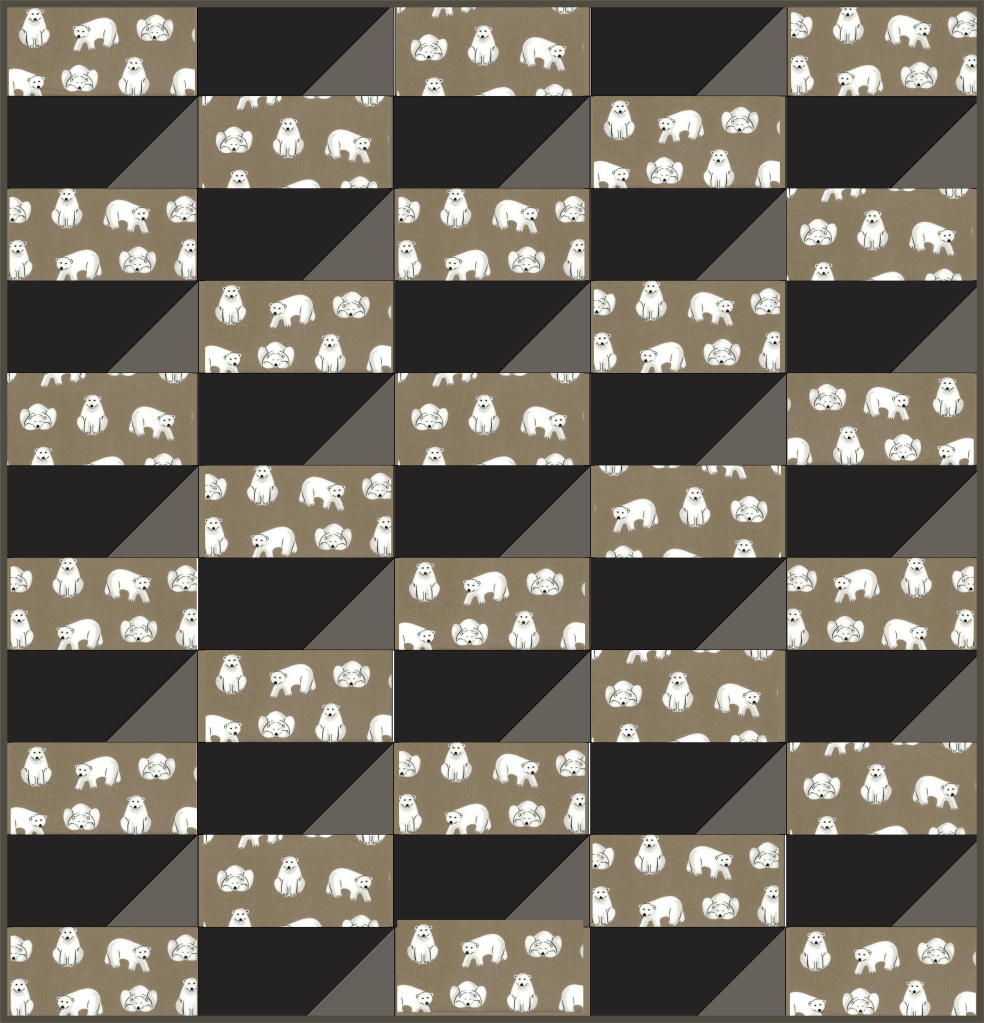
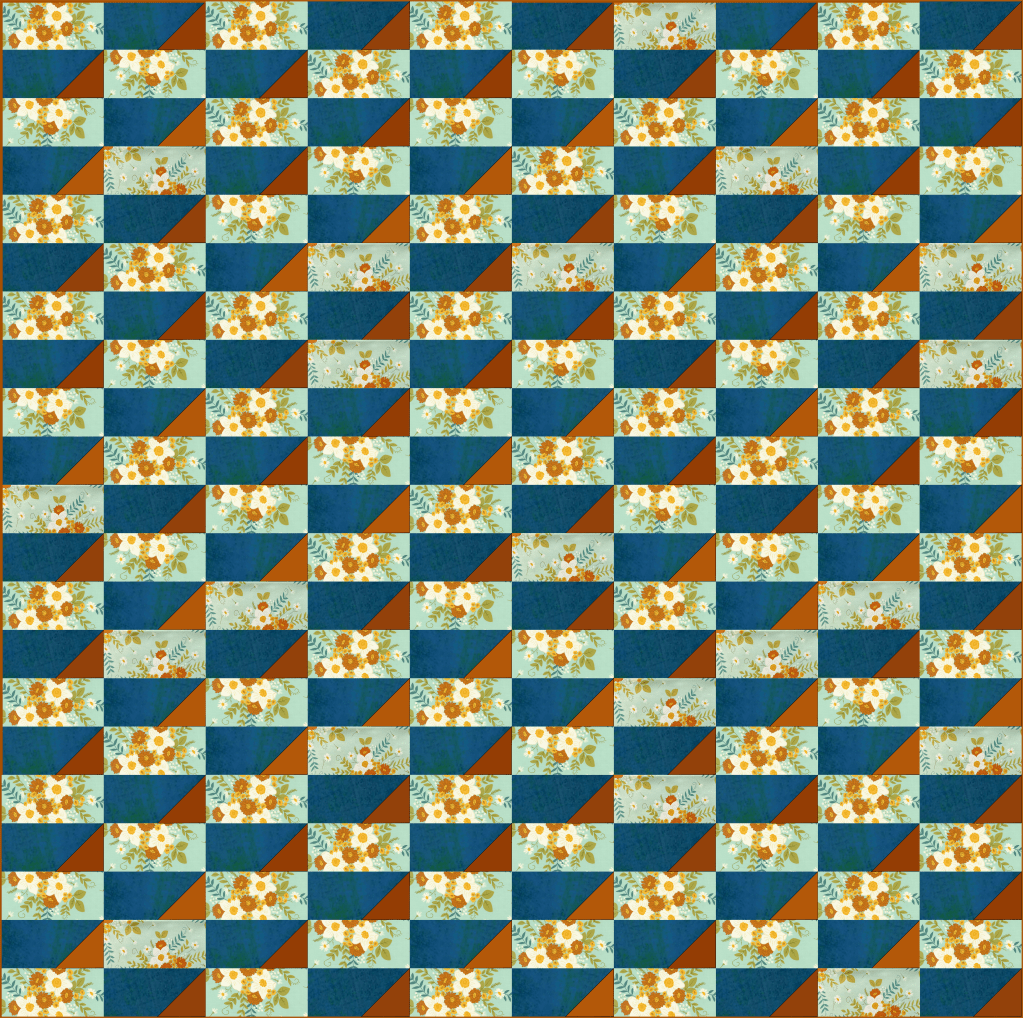
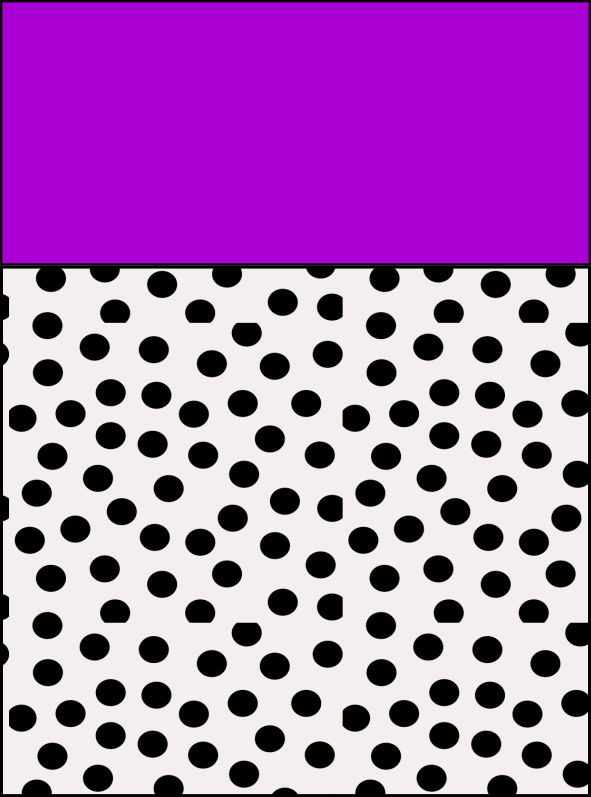
I then put these units in columns on a design wall but if you don’t have that kind of space, you may just be able to work column by column. Generally speaking I did columns of darks on the right and left sides with some exceptions and then the 2 1/2″ accent pieces (shown here in purple and orange) were staggered horizontally across the quilt, left to right:

When you want the accent pieces that run left to right to change direction, there are a couple of ways of doing that. One is to use a 4 1/2″ tall by 5″ wide rectangle as pictured above in the very right hand column immediately below the polka dot square. It’s not another 5″ square because of quilt math (seam allowances and etc…) This sends the accent fabric back the other direction.

Another “switch” that you can do is to split the accent rows by sewing a 2 1/2″ by 5″ piece that blends with your 5″ square fabrics to a 2 1/2″ accent fabric. Place that unit in a column to split the accent fabric as pictured on the right side:

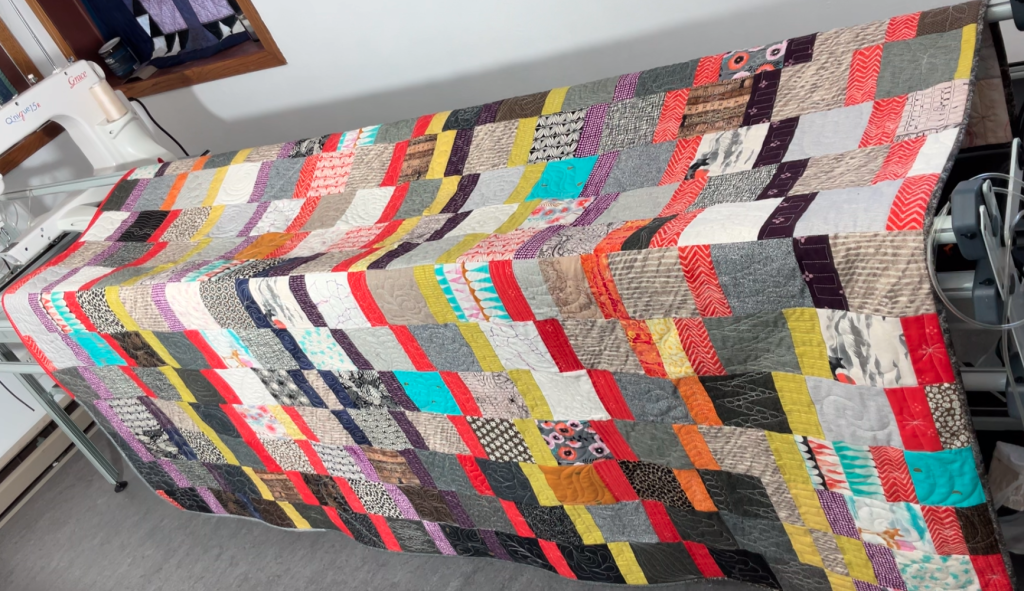
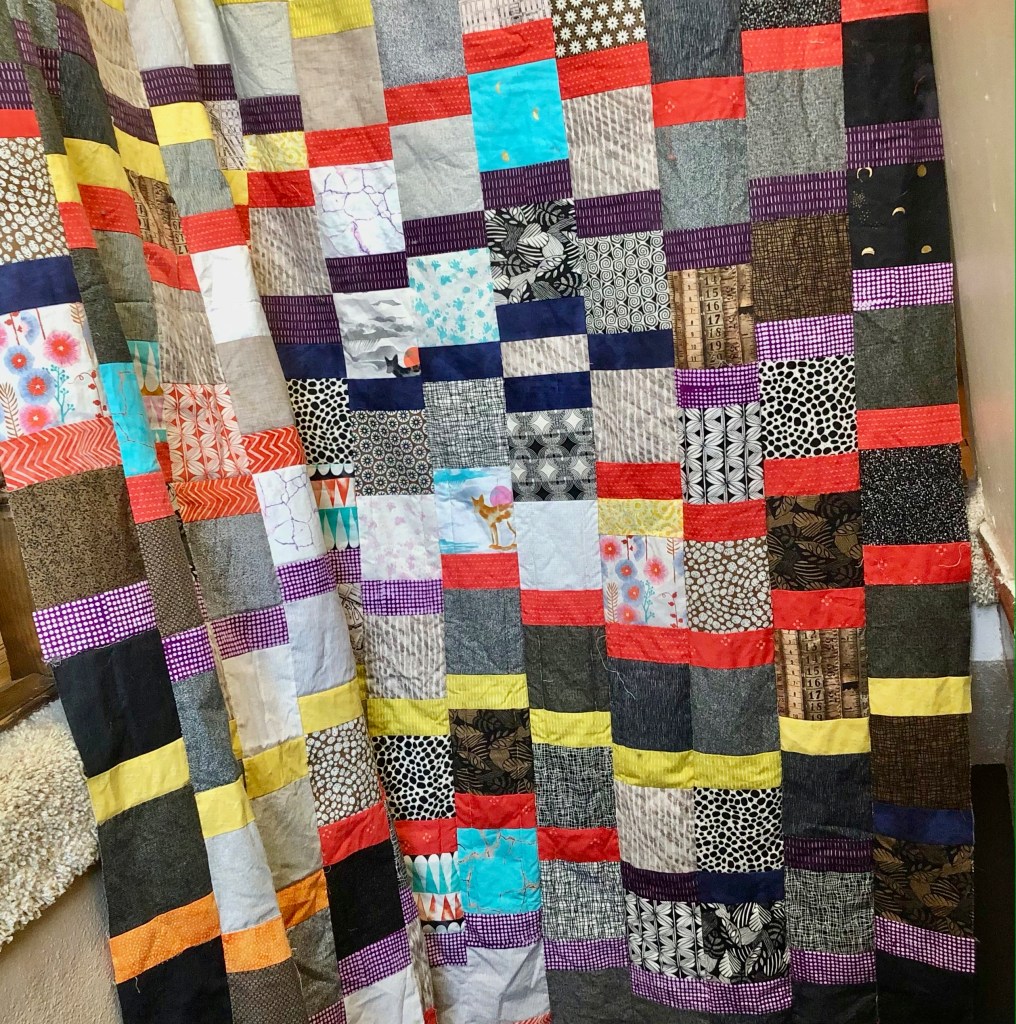
Here’s a photo of my top/flimsy before I quilted it. Note on the lower right side I simply kept the accent fabric straight from one column to the next instead of staggering it which also meant the background fabrics were parallel in a few rows there. If you look around the top in general, you’ll see some spots where I threw in a 2 1/2″ accent piece just to “move” the accent lines. Most of my accent colors are orange, red, yellow, and purple but I had some navy/dark purplish strips I threw in. I kept some of my accent fabric lines short, possibly because I just didn’t have enough of that fabric! Also, changing the lengths of the accent lines creates a little more interest in the top or changing the accent color part way across the top. If you would prefer a more regular “wave” of the accent lines from left to right, then go ahead and make that top! I’m sure it will be beautiful!

Once you have your layout and columns figured out, you can simply sew the columns together. I recommend pinning all along these long seams.

Please watch this video to see more of how I used these layout strategies for this quilt top.

So there you have it: basically just sew your 5″ charm pack squares to your 2 1/2″ leftovers from bindings or jelly rolls or because you – like so many of us do – cut your scraps into 2 1/2″ strips. Chop them up and remix them and you’ve done some stash busting! Bonus points for doing some (probably) mindless chain piecing too while listening to a book or “watching” some tv.

Feel free to send questions my way!

Making the Starlight Lone Star Quilt

^ My Starlight Flimsy ^

I don’t know if you’ve seen it before but Wishwell Designs and Robert Kaufman fabrics have this *free* quilt pattern titled “Starlight” for a beautiful Lone Star quilt design available on the Robert Kaufman site. It features the “Moonlight” fabric line designed by Wishwell which has ever so slightly glittery folk-art/tarot card stylized suns and moons. I fell in love with the fabric so I made the Emerald Colorstory model for Gruber’s Quilt Shop. I did a few things differently – including strip-piecing the Lone Star sections – and I wrote a lot of notes in order to share them with more makers. This is *NOT* a Beginner Friendly pattern so if you’re a beginner, go ahead and download the pattern and these notes but then go back and work your way up to this one. I mean, it’s a really lovely Lone Star design but there are Y-seams in it plus all those diamonds that even if you strip piece, you’ll want to be familiar with handling so much bias and getting your points to match up decently probably. You could maybe avoid the Y-seams but even then, I would want you to have some more experience than just a couple of basic quilts under your belt. Anyone else wanting to take on the challenge, read on!

For starters, make sure you download the latest version of the pattern – there were some corrections to the original pattern so whatever’s on the Kaufman website is probably the most recent one. In the version I had, there had been corrections to yardage but on Page 3, for Fabric B cutting instructions, I found I needed Eight Template 1 cuts, not Four. Additionally, from Fabric D, the second border should be cut at 31/2” x 661/2” – NOT 651/2” as was written in the copy I had.

If the Fabric D cutting instructions you downloaded still have the wrong measurement, then you’ll probably also need to adjust the next two borders:

From Fabric I (G in this colorway) side borders should be 31/2” x 661/2” and the top/bottom borders should be 31/2” x 721/2”.

From Fabric K (H in this colorway) side borders should be 2” x 721/2” and the top/bottom borders should be 2” x 76”.

On Page 5 in Step 6, your seams won’t nest when sewing. Your seams will overlap at the quarter inch seam allowance. As you create the strips of diamonds for each large star “point” section in the previous Step 5, if you press the seams of one strip to the next to opposite sides instead of open, they will nest when you sew them together in Step 6. I use different colored arrows here to indicate how I pressed the seams in alternating directions from strip set to strip set:

The yardage in this kit/Emerald Colorstory is generous to the point of being excessive. If you are fussy cutting every single Template 4 and all the others, maybe, just maybe you’d use up the yardage but I don’t think so. If you purchase the yardage as is for the Emerald Colorstory you’ll have a lot of leeway. I can’t speak to the Astral Colorstory (blue) as the cutting instructions are different and I’m not delving into it.

Extra fabric can be beneficial if you make a whole bunch of miscuts or if you want to fussy cut the diamonds in the Lone Star, especially of the suns and moons. Like, if you are careful, you could strip-piece all the other fabrics except Fabric E – the suns and moons – and just FILL that row of diamonds with the artwork by fussy cutting each Fabric E diamond with Template 4. I think that would be gorgeous and PLEASE SEND ME A PICTURE IF YOU DO THAT. Additionally, there’s enough of Fabrics G & H that you don’t have to make the borders as in the pattern. So you might wish to first cut only the pieces for the center of the quilt top and then make decisions about the borders later as I did. If you make the borders bigger, remember you’ll need more binding because your top will be bigger. I had a healthy quarter yard of Fabric F left over from piecing plus the 5/8 yard included for the binding so I should be able to get more strips for binding from it. When the flimsy is quilted, I’ll evaluate it then. Another option is instead of a 21/2” binding strip, I could bind with 21/4” strips and I think that would be fine.

In my version above, Border 1 of Fabric D is the same as the corrected pattern. Border 2, from Fabric G, I made slightly narrower however, I have almost a full yard of fabric leftover so I could have made it wider too. The final border, Fabric H, I made substantially wider and included cornerstones cut from remnants of Fabric E (fussy cut to have a moon or sun in the middle of each) at the same width as the final border.

Border 2, I cut strips 3” wide by 661/2” long for the sides and 3” wide by 711/2” long for the top/bottom. Border 3/final, I cut at 6” by 711/2” for all 4 sides. I added four 6” square cornerstones of Fabric E to each end of the top and bottom strips before sewing onto the quilt top.

Here’s how I Strip Pieced the Lone Star Diamonds. First, I cut SCANT 25/8” strips of the various fabrics, sewed them into strip sets in the order indicated following.

You would need:

3 strips of B

3 strips of A

6 strips of C

4 strips of H

5 strips of G

6 strips of F

5 Strips of E

4 Strips of D

You then create/sew these Sets:

B – A – C – H – G – F

A – C – H – G – F – E

C – H – G – F – E – D

H – G – F – E – D – C

G – F – E – D – C – B

F – E – D – C – B – A

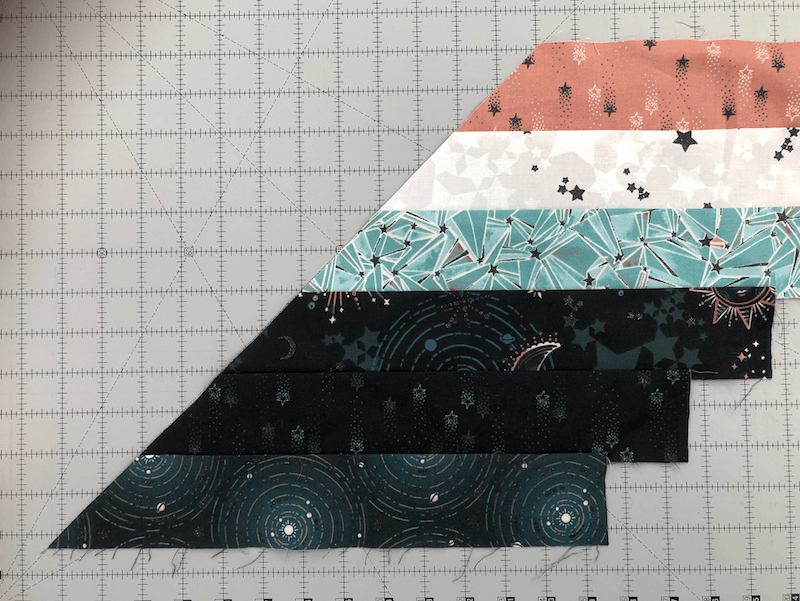
When you sew these strips together, you can offset each strip a couple inches to “save” fabric since you’ll be cutting the whole 6-strip piece at an angle later. Here you can see I sewed my 2nd strip a little over 2″ to the right of the edge of the 1st strip – the teal stars on the bottom. My 3rd strip is also pinned a couple more inches to the right:

Next, you cut the completed 6-piece Strips Sets at a 45 degree angle into (8) substrips at SCANT 25/8” (You can and should use the Template 4 as a guide to make sure your strips are the same width as it is.) In this photo, I used the 45-degree marking on the mat to trim the edge of my strip set.

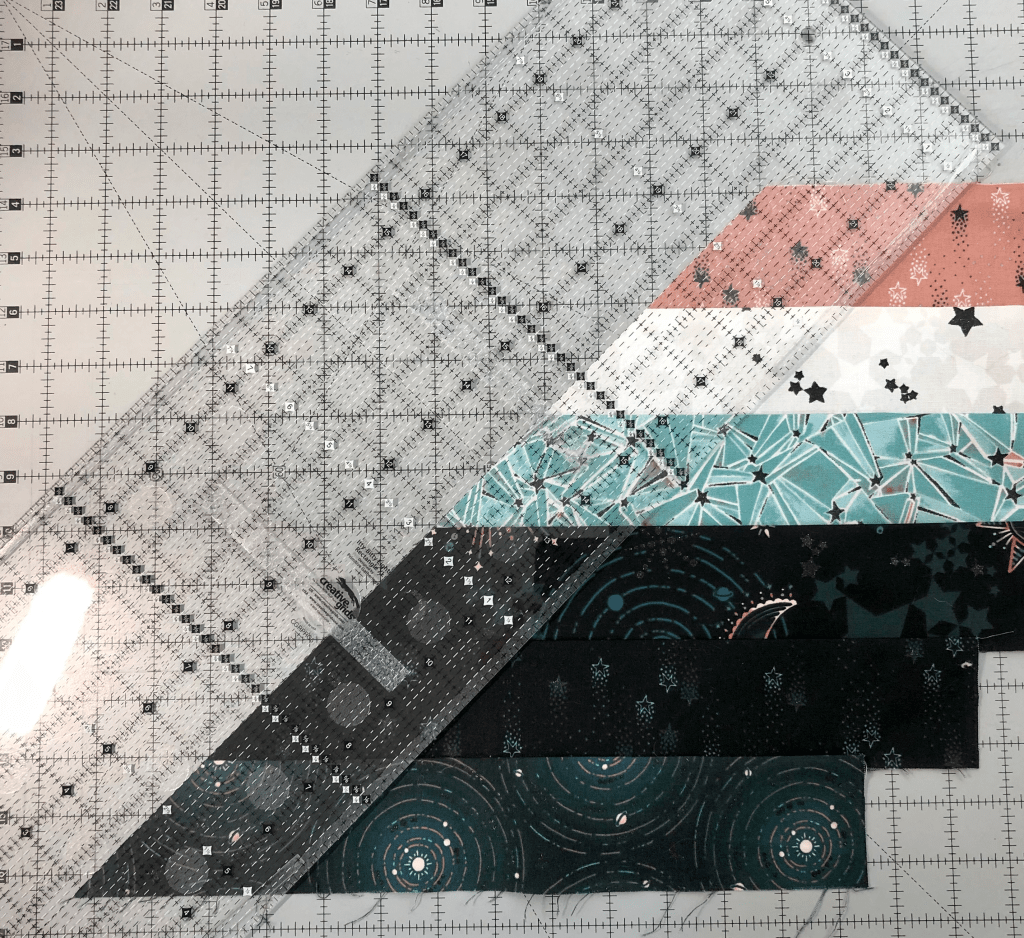
Then, I used a Creative Grids Itty-Bitty Eighths ruler to cut a SCANT 25/8” slice off of the left side. Ruler positioned in this photo:

Once they’re all cut, you can assemble the diamond units as in Steps 5 and 6.

Next, let’s talk about Y-seams a little bit. ok, you only have 8 of them to deal with or 16 if you, like I do, always start at the Y intersection and sew outwards. I only had to rip out a couple of them and redo them. IF YOU WANT TO COMPLETELY AVOID Y-SEAMS IN THIS TOP: You could split Template 1 in half lengthwise and add on your seam allowance. This would result in a Template 1 Left and Template 1 Right. There’s plenty of Fabric B in this Colorstory to do this. You would then construct the Triangle Units on Page 4 in Left and Right halves with the other templates, 2 and 3, except don’t sew the large Fabric E triangles on in Step 3. Instead, sew the Template 1 half units onto the sides of the points of the diamond units. Then as you sew the 8 diamond units together, you just continue sewing the seam through the split Template 1 out to its end. Once your star is all assembled, you would sew the large Fabric E triangles onto the corners to make the center square. If I ever make this again, this is totally what I’m going to do (and I will get some more photos of how I’m doing it.)

In conclusion: these notes are not a guarantee of results. This is an intermediate to advanced pattern and my recommendation is that you should be comfortable with either testing this pattern with scrap fabrics at various points to make sure you’ll get the results you need, or that you are confident enough in your skills that you’re sure you can get through all this.

Have fun and enjoy the pretty fabrics while you’re doing it!

The kit of this quilt is available at Gruber’s Quilt Shop

The Sampler Book is Here!

It’s back from the printer and it’s available at Gruber’s Quilt Shop!

For the time being I’m selling “Know Them, Raise Them, Be Them: 20 Quilt Blocks for 20 Amazing Women” through my Local Quilt Shop. We need to keep brick and mortar stores alive so please support them by purchasing through them. They’ll ship it out to you in a jiffy.

Thank you!

Know Them, Raise Them, Be Them Sampler

Life has been crazy hasn’t it? Before the Covid-19 pandemic and all the changes around the worldwide response to that, I started working a lot for my local quilt shop again last fall, helping them get their computers and data together for a new point-of-sale system. Between that and a sampler that I’m writing and my son graduating high school, I have not really found time to post any new content here. I apologize for that because I can see people are checking in and I’d like to keep y’all up to date!

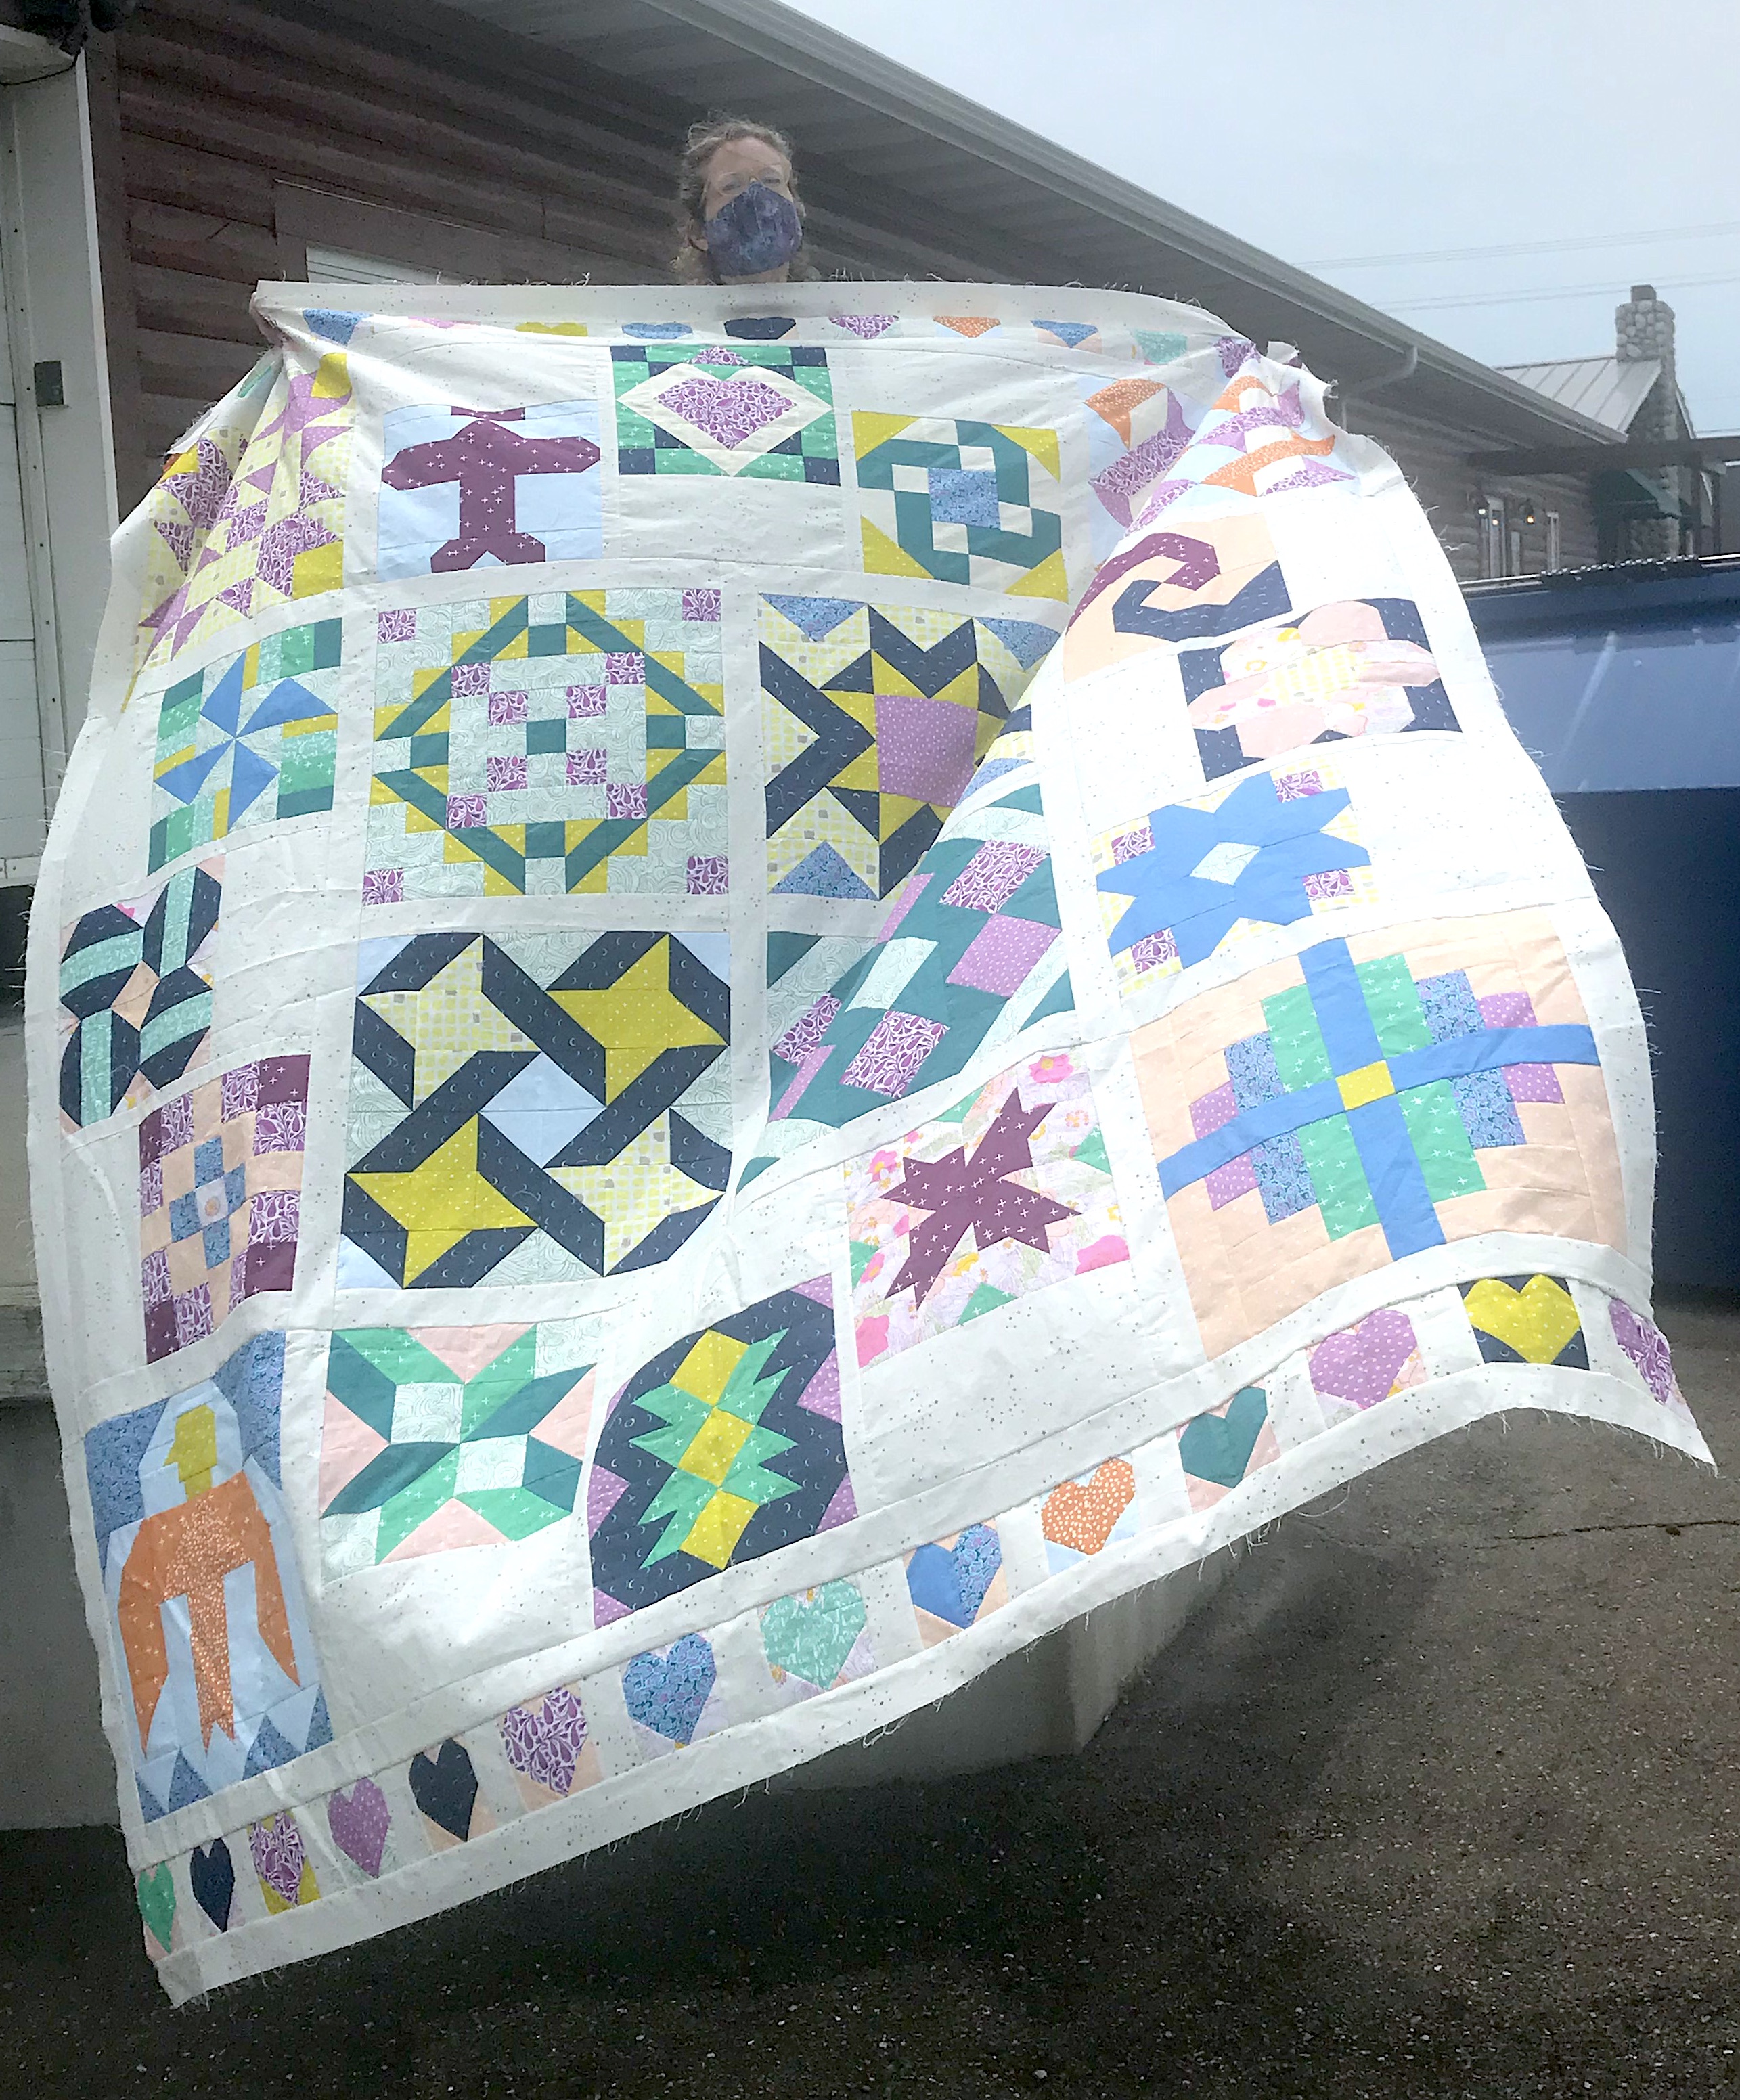
Guys! I’m writing a whole sampler! It’s a big stretch for me and as always happens with my creative process, I go through stages of loving it, not loving it, just wanting it done, and being so excited that this HUGE project is something I can even do! It’s really just about complete – just need the testers to go through the setting instructions for me.

More fun still for me is that it’s the “Know Them, Raise Them, Be Them” sampler honoring 20 women throughout history to whom we can look for inspiration. I wrote condensed biographies of each woman (and got great proofreading and editing help from my husband and from a dear friend). I have to say that the research and thinking about each story was wonderfully reflective and educational for me. I hope it’s the same for many quilters.

Here’s my first flimsy of the quilt, photo taken on a hazy day:

KnowThemFlimsy

And it’s getting quilted at The Quilt Shack at Lichy Woods. Her Facebook page is at  https://www.facebook.com/quiltshacklichy if you want to follow along. She’s doing some very fun custom quilting for me.

The patterns have been published on Gruber’s Quilt Shop’s website over the last several months as many of you already know. We’ll have the whole package for sale there as soon as testers approve the final setting instructions!

Thanks for stopping by –


Millennium Falcon Patchwork Block

MillenialFalcons

Or as a young co-worker of mine said, “I don’t know what a Millenial Falcon is.” aaawwww… I gave her a fist bump. Should I just call it a “Rebel Spaceship” block? I mean, am I going to get sued? ok, *what*ever… It’s a humble little block in homage to one of our favorite scifi/family-problems drama series, right? Also, Han is hot.

For this block, you’ll need a 45 degree ruler or template. The body of the Millennium Falcon is basically a classic kaleidoscope/octagon quilt block. My favorite ruler for this is Creative Grids’ Spider Web ruler by Karla Alexander. Admittedly, I’m generally a fan of her rulers as she makes an effort to indicate so many cutting options and sizes, always, *and* in such a way that you don’t end up with bias edges on the outside of your blocks (more about that at a later date). When you cut your triangles, the ruler has a little black triangle marking at its tip that extends beyond your fabric strip – indicated with the lime green circle here (some might call this a “smart corner”):

SpiderWebRulerTip

Maybe you have a different ruler. The Squedge 45 degree ruler has a flat top that will line up with the top of a rectangle or strip as does the smaller Creative Grids Kaleidoscope and Dresden 45 degree ruler, CGRTKAL45. If you use another 45 degree or kaleidoscope ruler that includes the triangle tip but it’s not blacked out or marked in some way to eliminate the excess fabric, you will need to cut your kaleidoscope triangles at 4 ⅞” (or even 5″ but you’ll trim more) when the sharpest point is included.

I used up scraps for my fabrics and even did a block with mostly upcycled shirts from my father and from my husband. Since Star Wars is at least in part about father *and* husband issues, I think it’s appropriate! You could easily get the (8) kaleidoscope triangles out of a fat quarter but I’d recommend pulling scraps – a single 5″ by 4 ¼” rectangle would give you one kaleidoscope triangle, a 4 ½” tall strip (as in my picture above) longer than 4 ¼” will get you more triangles. If you can throw in some red bits at the tips of your triangles too, the original Millennium Falcon does have some red panels on its hull but I did not include specific directions for those.

I also use Karla’s Straight Out of Line ruler to make the wedge blocks here. It’s a gentle angle and could be done without the ruler but I like the consistency of having a ruler – I’m much less likely to mess up my cuts.

A scant ¼” seam allowance is what I want you working with here. This means your needle and therefore your seam will fall at *not quite* a quarter of an inch. Your seam should be a thread or two less than a quarter inch. This way when you press open, material that is lost in the fold (it is just the mechanics of it) will not impact your final size.

Fabrics and cuts:

(8) 45 degree triangles from lights/grays, 4 ½” tall with flat top, 4 ⅞” with point

(2) 3 ¾” squares of black or darks, cut once diagonally to make a total of (4) half square triangles

(2) 4 ½” squares of lights/grays* for wedges/”mandibles”

(2) 4 ½” squares blacks/darks* for wedges

(1) 2” square light/gray

(1) 2″ x 3″ dark rectangle

(1) 2 ¼” square light/gray

Assembly:

Piece your (8) 45 degree triangles into a kaleidoscope center. I usually do (4) pairs proceeding around the kaleidoscope, then pairs of pairs to get half the kaleidoscope, then the (2) halves together.

Each half should have a good ¼” seam allowance above the points. Here’s a pretty good one:

QrtrInchSeamKaleidHalf

I press in one direction around my kaleidoscope. Here’s the back of the same half:

KaleidHalfBack.JPG

Sew the (2) halves together to create your octagon/kaleidoscope. I press this seam open:
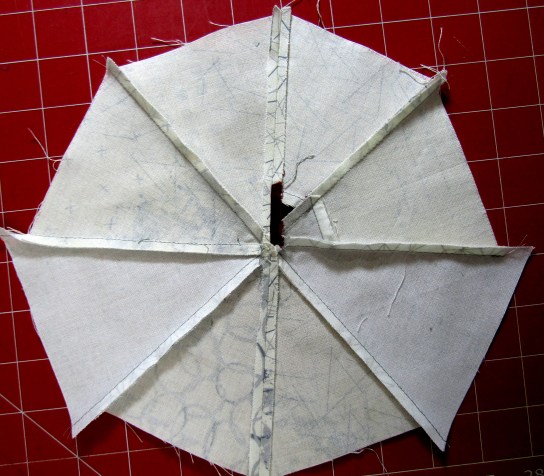
BackKaleidWhole.JPG

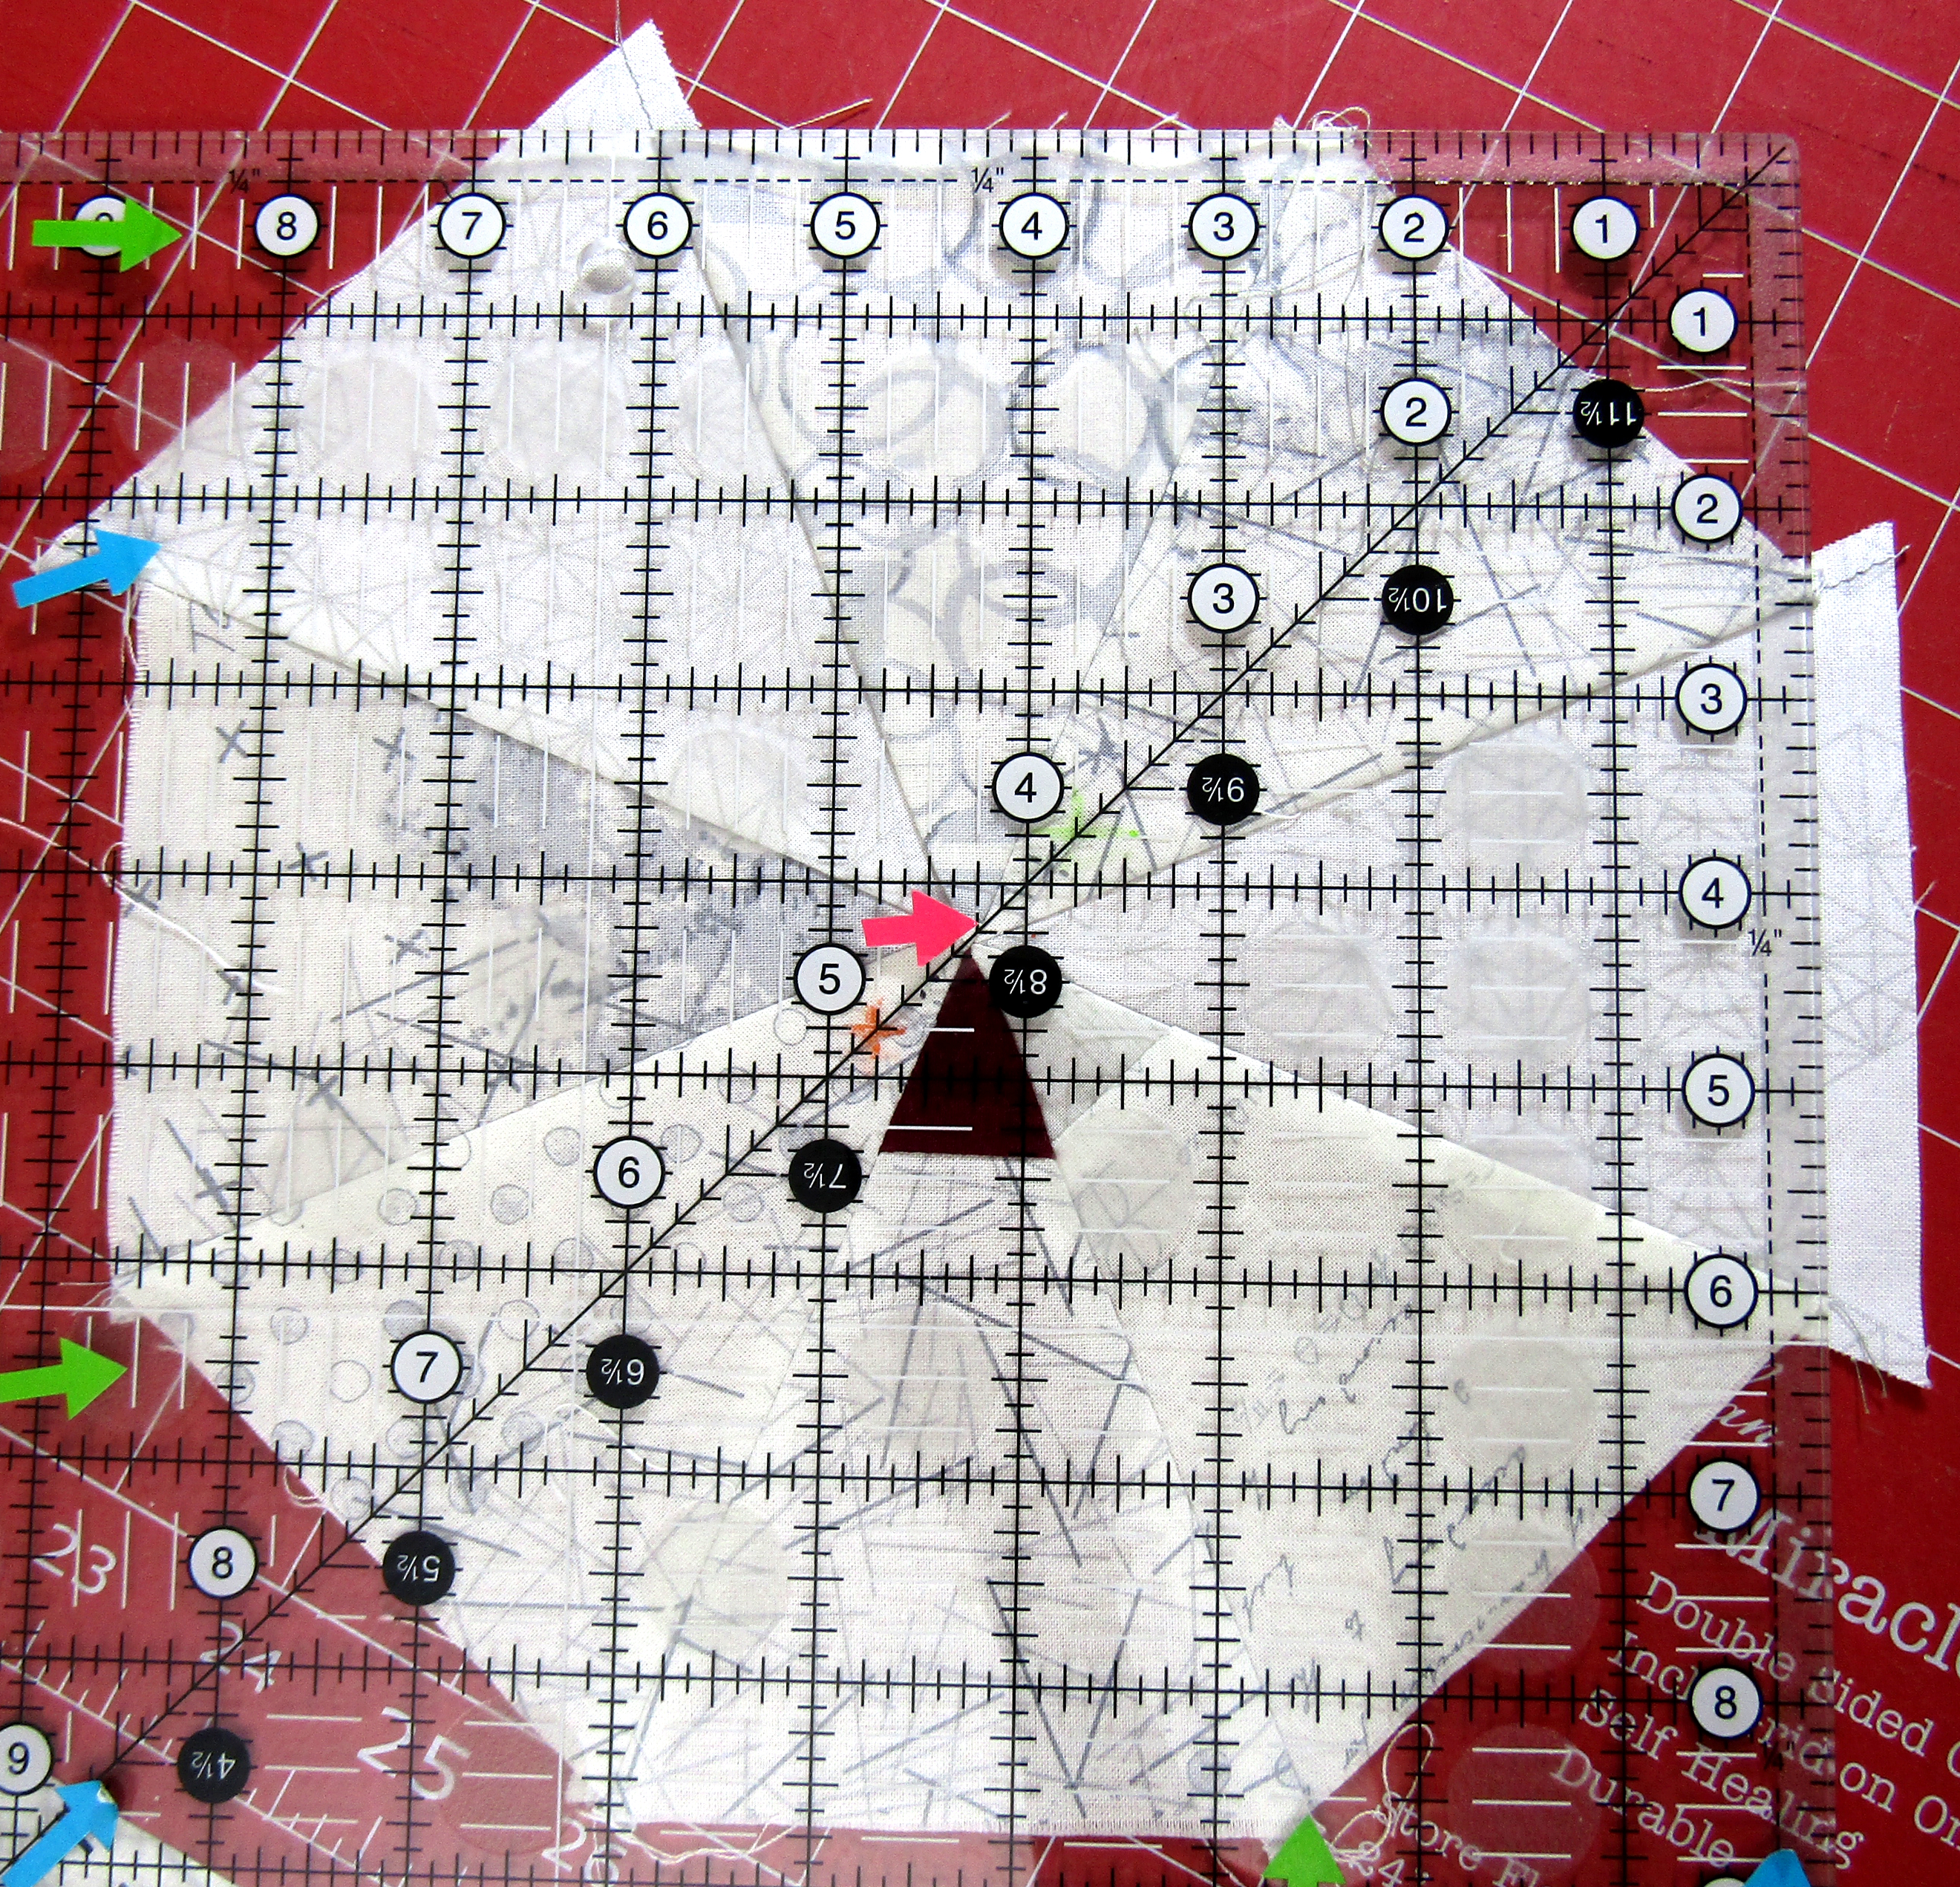
“Square” the octagon (Octagon the octagon?) at 8 ½” wide all the way around. Your 4 ¼” point should be roughly the center from both directions as indicated with the pink arrow. I made a couple of my 45 degree triangles from 5″ strips so I have more to trim off of those but even the triangles made from 4 ½” tall strips or pieces may have a little to trim off. :
SquareKaleido8pt5.JPG

Decide on the orientation of the MF’s (Millennium Falcon’s!) main body, sew a black half square triangle to each of the upper-left, lower-left, and lower right corners.

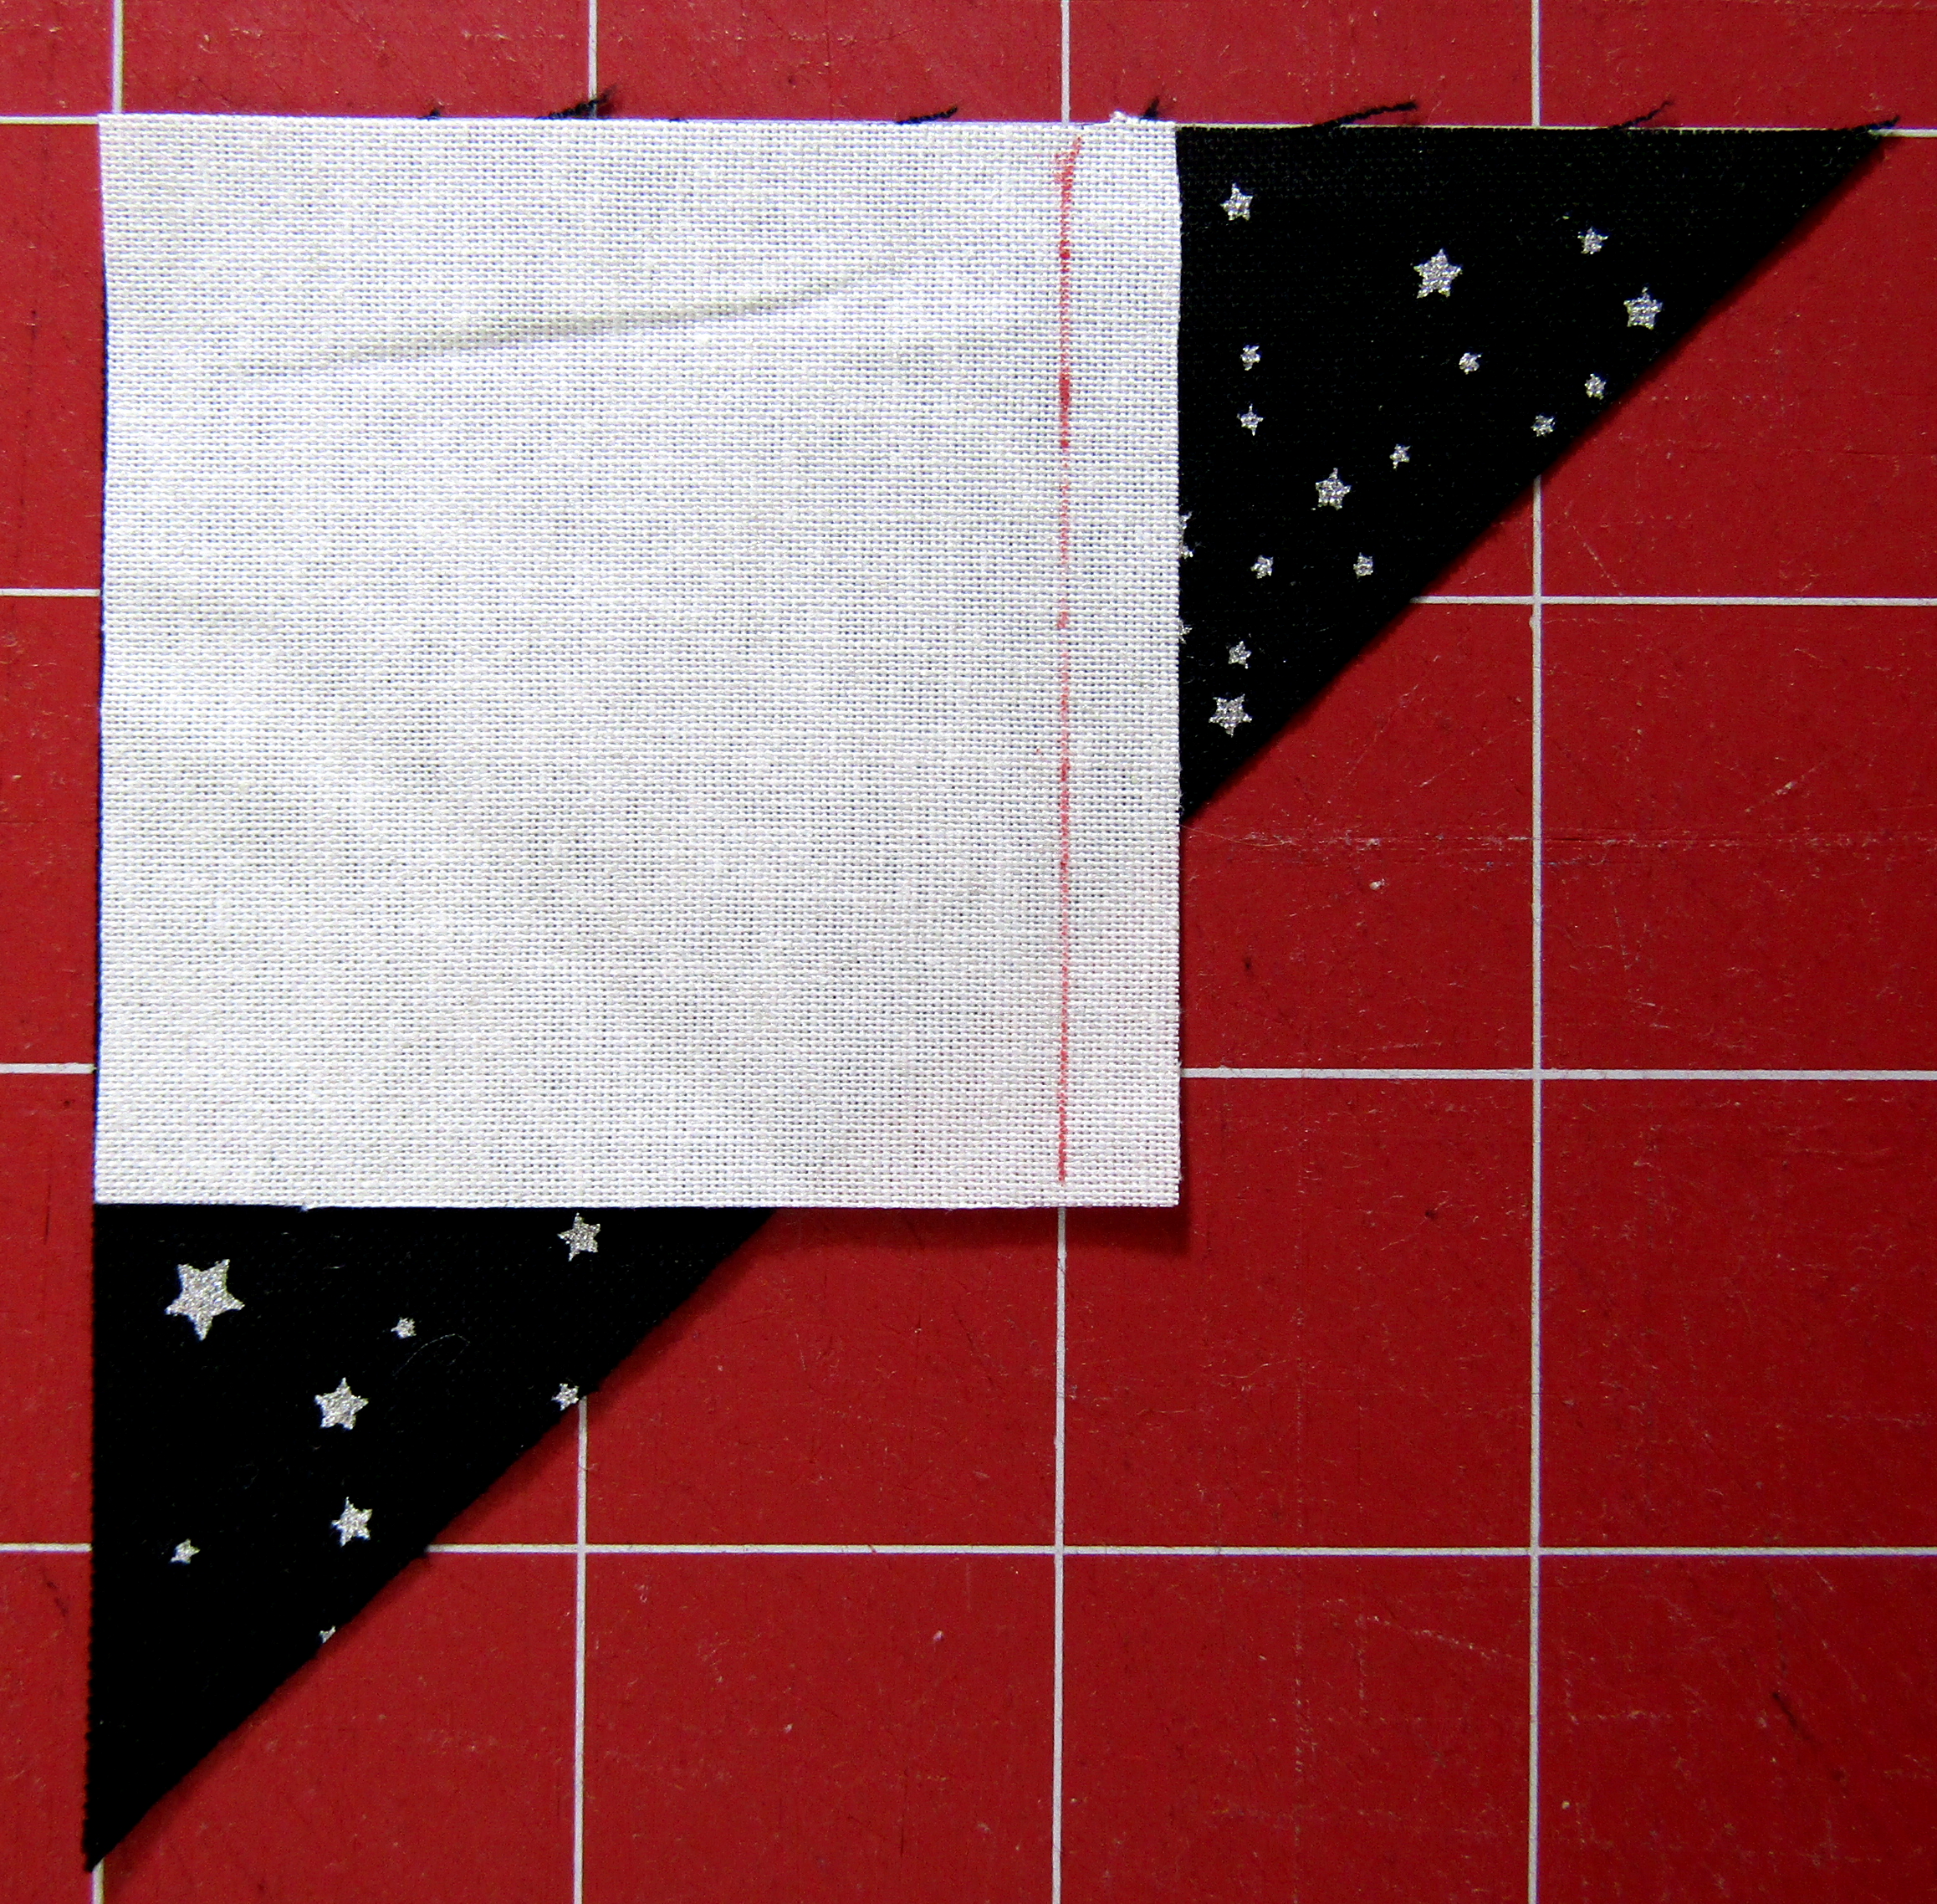
Take your 2 ¼” light square and place it right sides together with the last black half square triangle, lining up at the square corner of the black/dark triangle. Stitch your ¼” seam as indicated:
CockpitTriangle.JPG

Press this unit open, trim away the excess light and dark to make a half square triangle again the same size as the original dark triangle was. Sew it to the last remaining corner of the MF, the upper right, to get your “cockpit” corner.

Trim ¾” from the front edge of the MF (where the “mandibles” or wedge pieces will be sticking out) , like so:
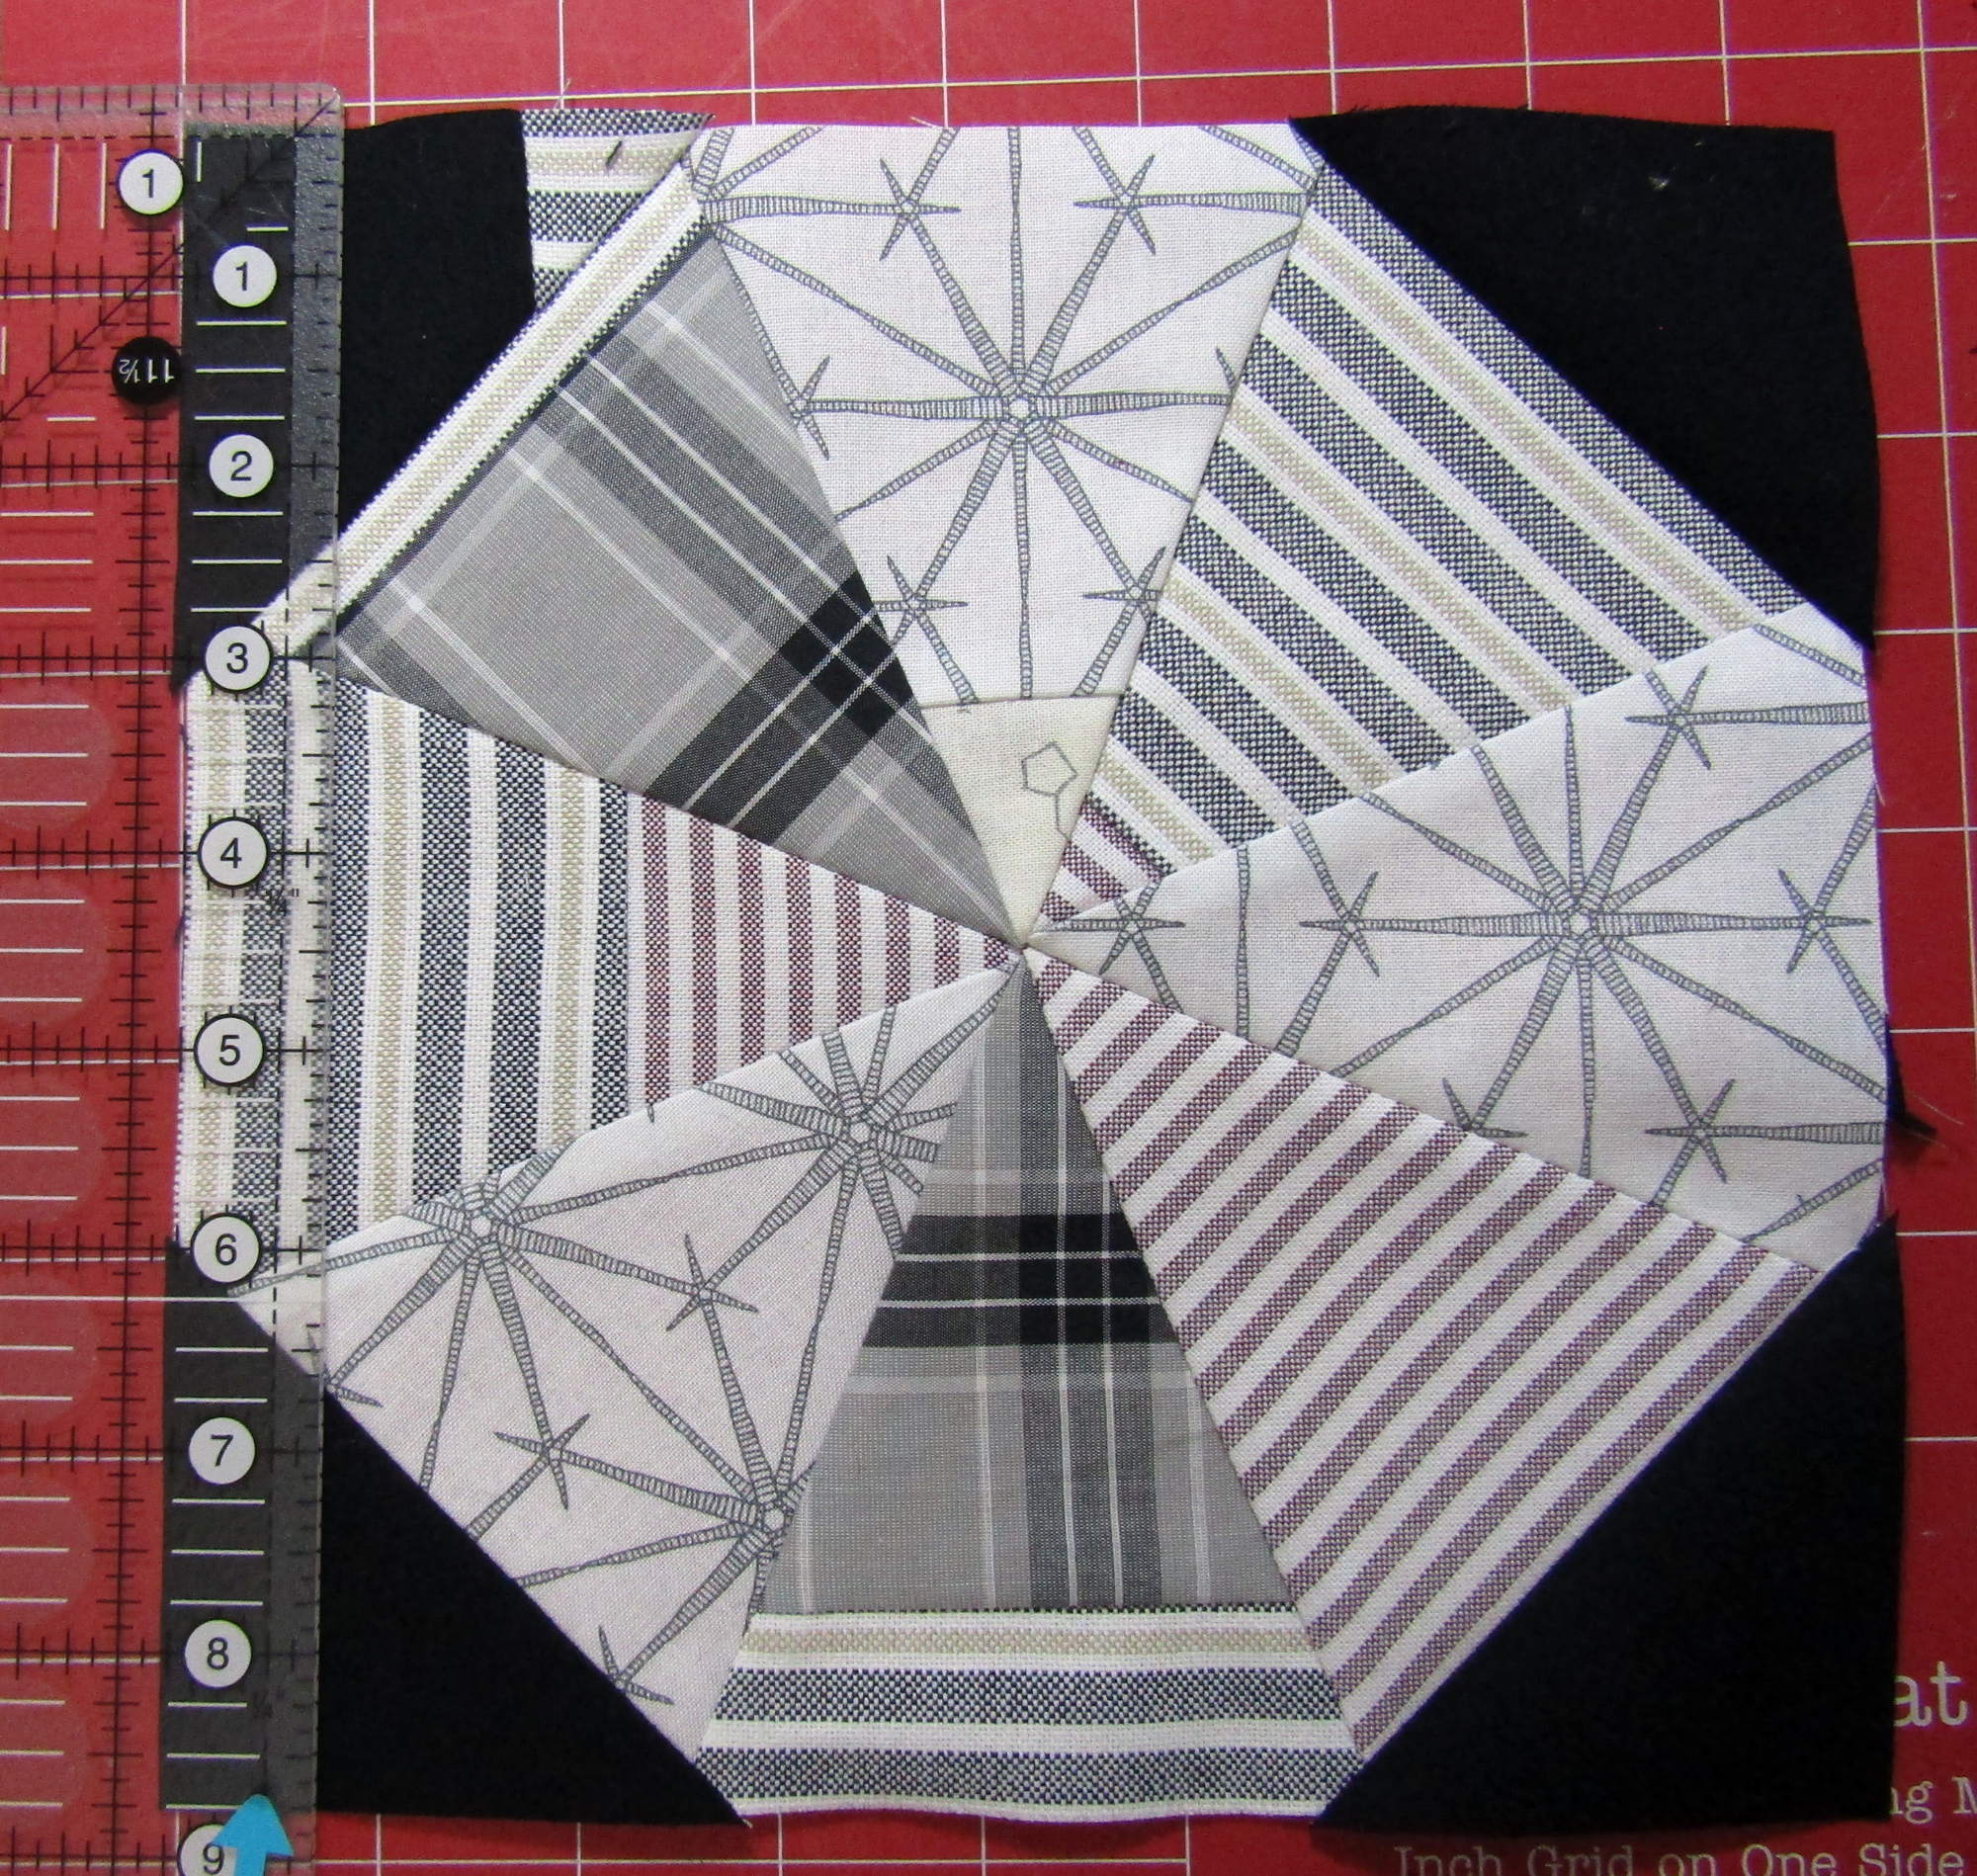
TrimBodyMF

Cut (1) light 4 ½” square into 2 wedges using the Straight Out of Line ruler (alternately cut across the middle of the square at a slight diagonal, not a deep angle) and flip the other light 4 ½” square upside down and cut it into 2 wedges to get your reverse or “mirror” cut wedges also either with the ruler or with a gentle angle using a straight ruler. (* This is where if you are using solids or wovens or other fabric that is easily reversible as some batiks are, you will only need (1) 4 ½” square each of light and dark because you can just flip your wedges into whatever orientation you need.) Repeat with your dark 4 ½” squares.

mirroredWedges

Sew (1) light wedge and (1) dark wedge together to form one mandible unit and (1) mirror light wedge and (1) mirror dark wedge to get your other mandible unit. When you put your wedges right sides together along the angled edge, there will be small dog ears at the ends and they should meet where your quarter inch seam allowance will fall:

dogearIllus

When pressed open, your mandibles should basically look like this:
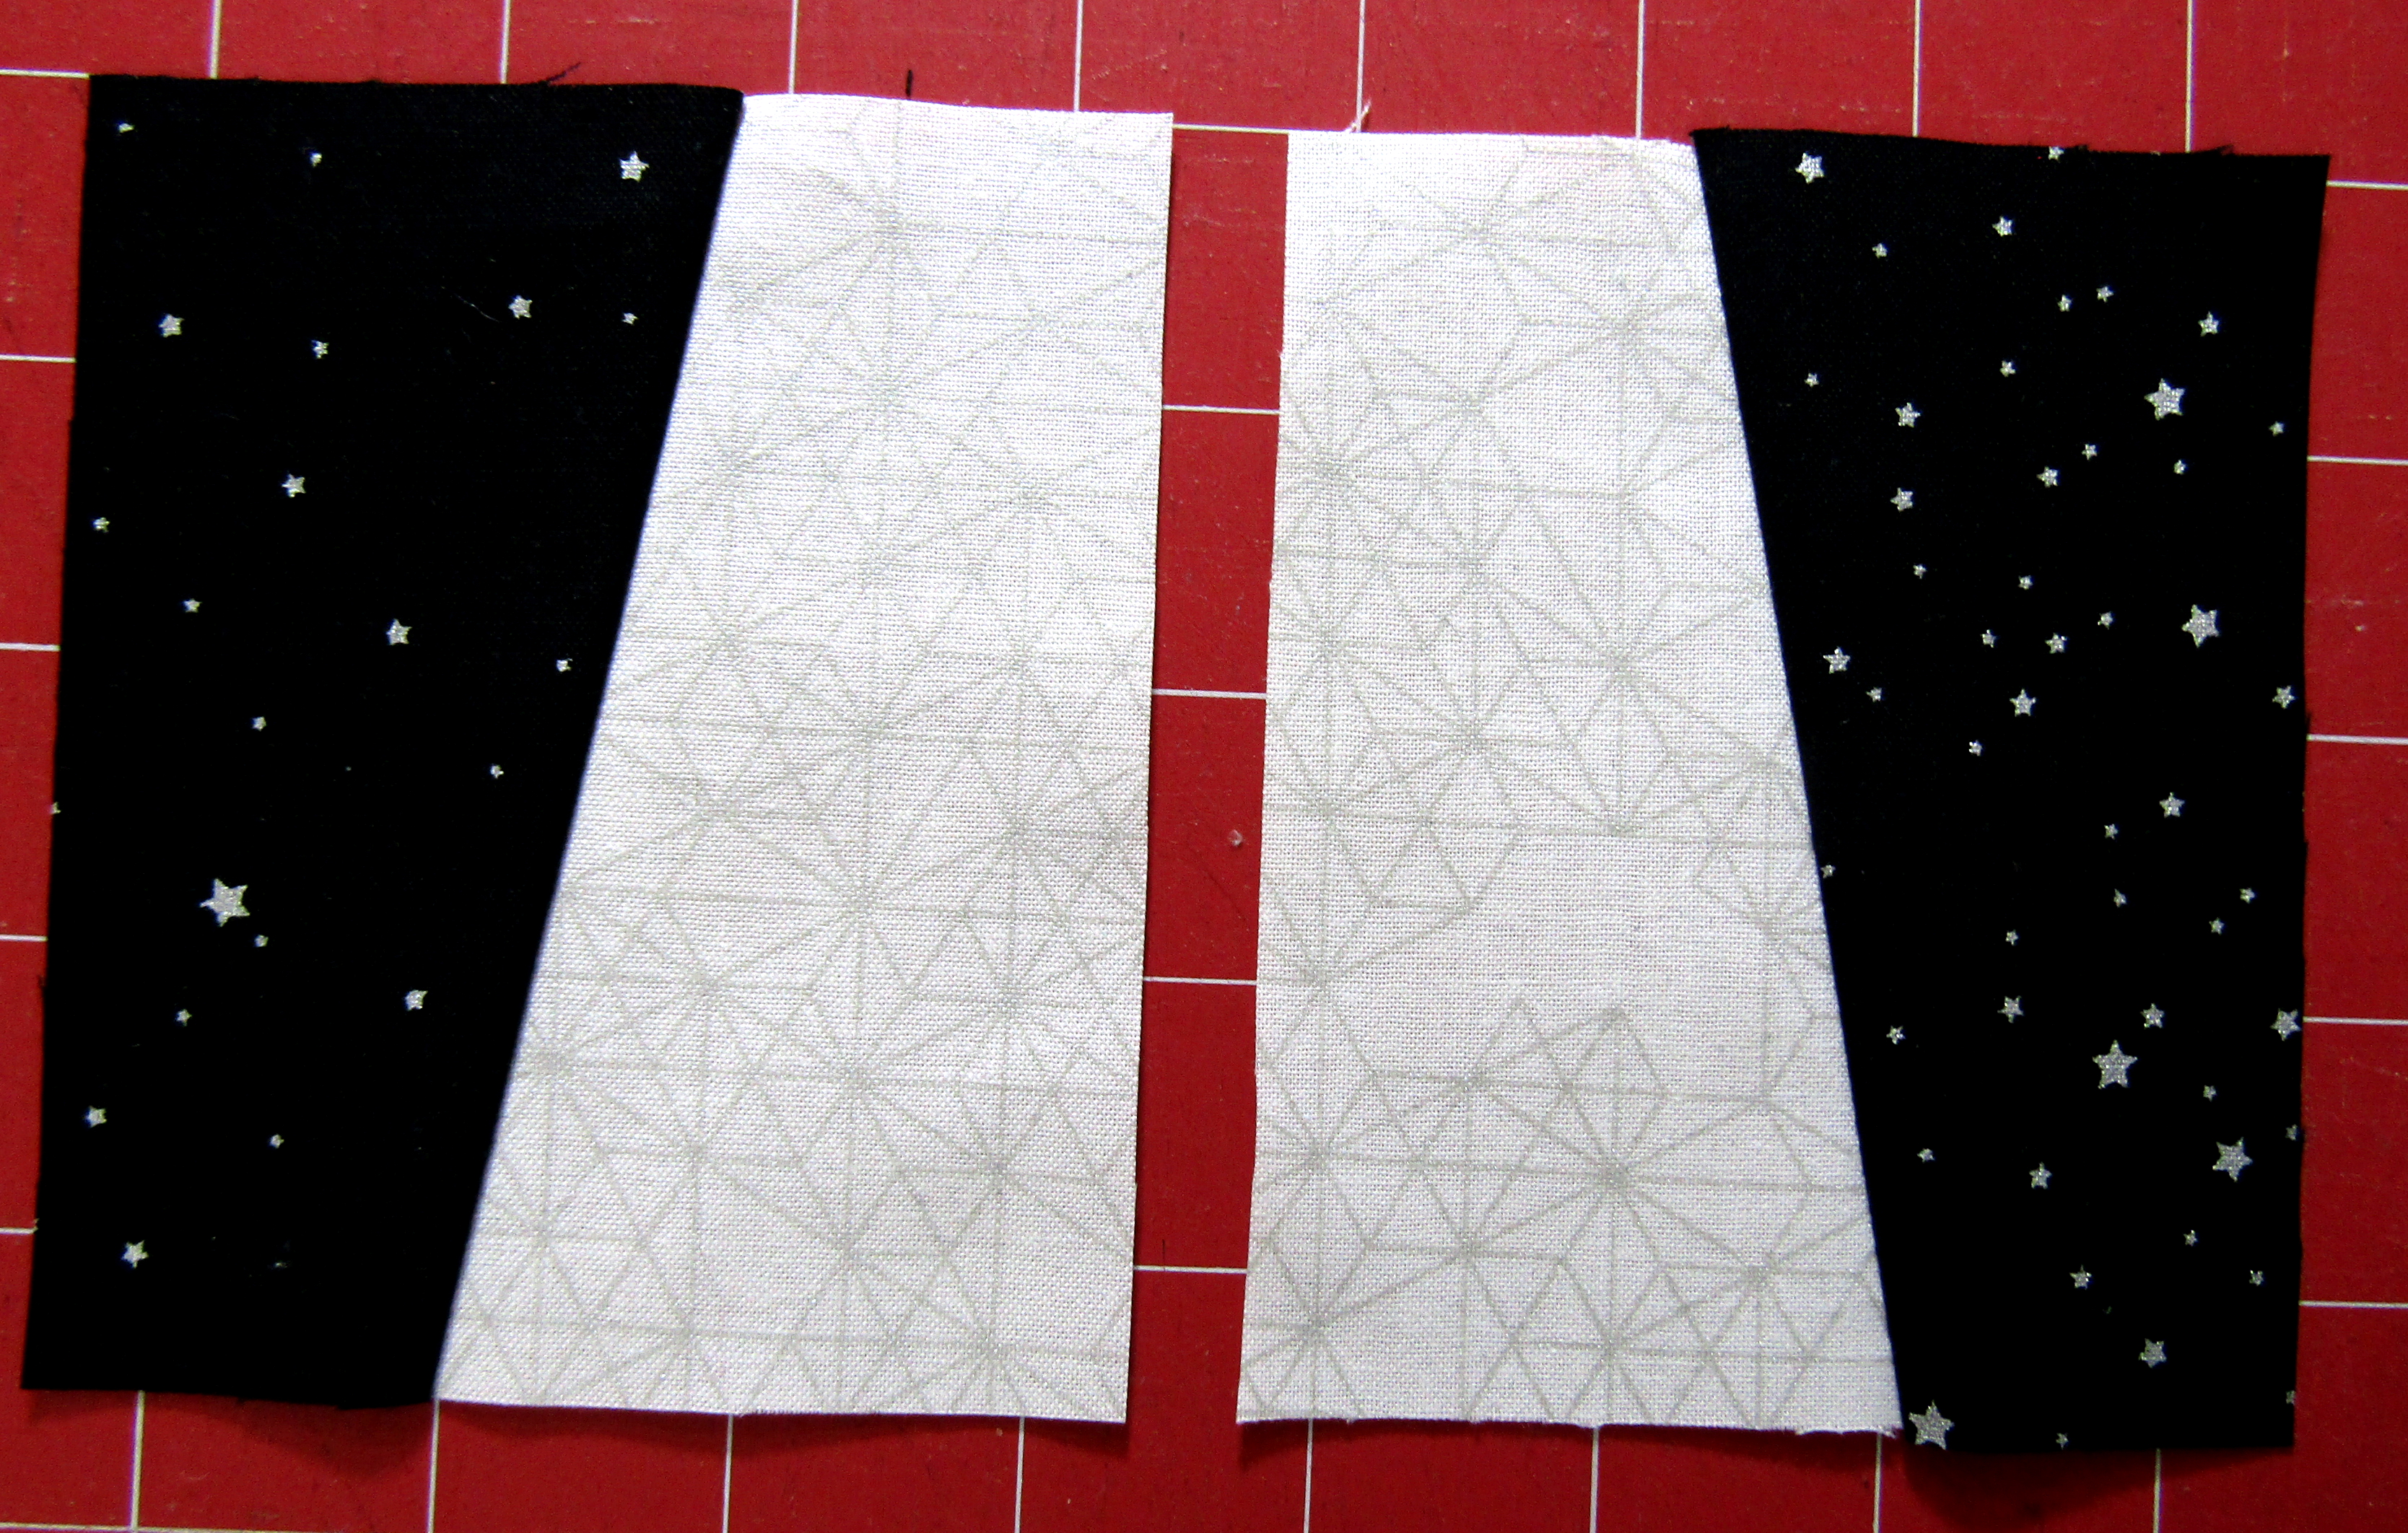
MFMandibles.JPG

Trim each of these units, by taking off some of the long edge of the light wedge, to 3 ¾” wide (they should still be 4 ½” tall but if not, trim each of them to be the same height also, 4 ⅛” or 4″ tall will be okay, it will just change your final size):
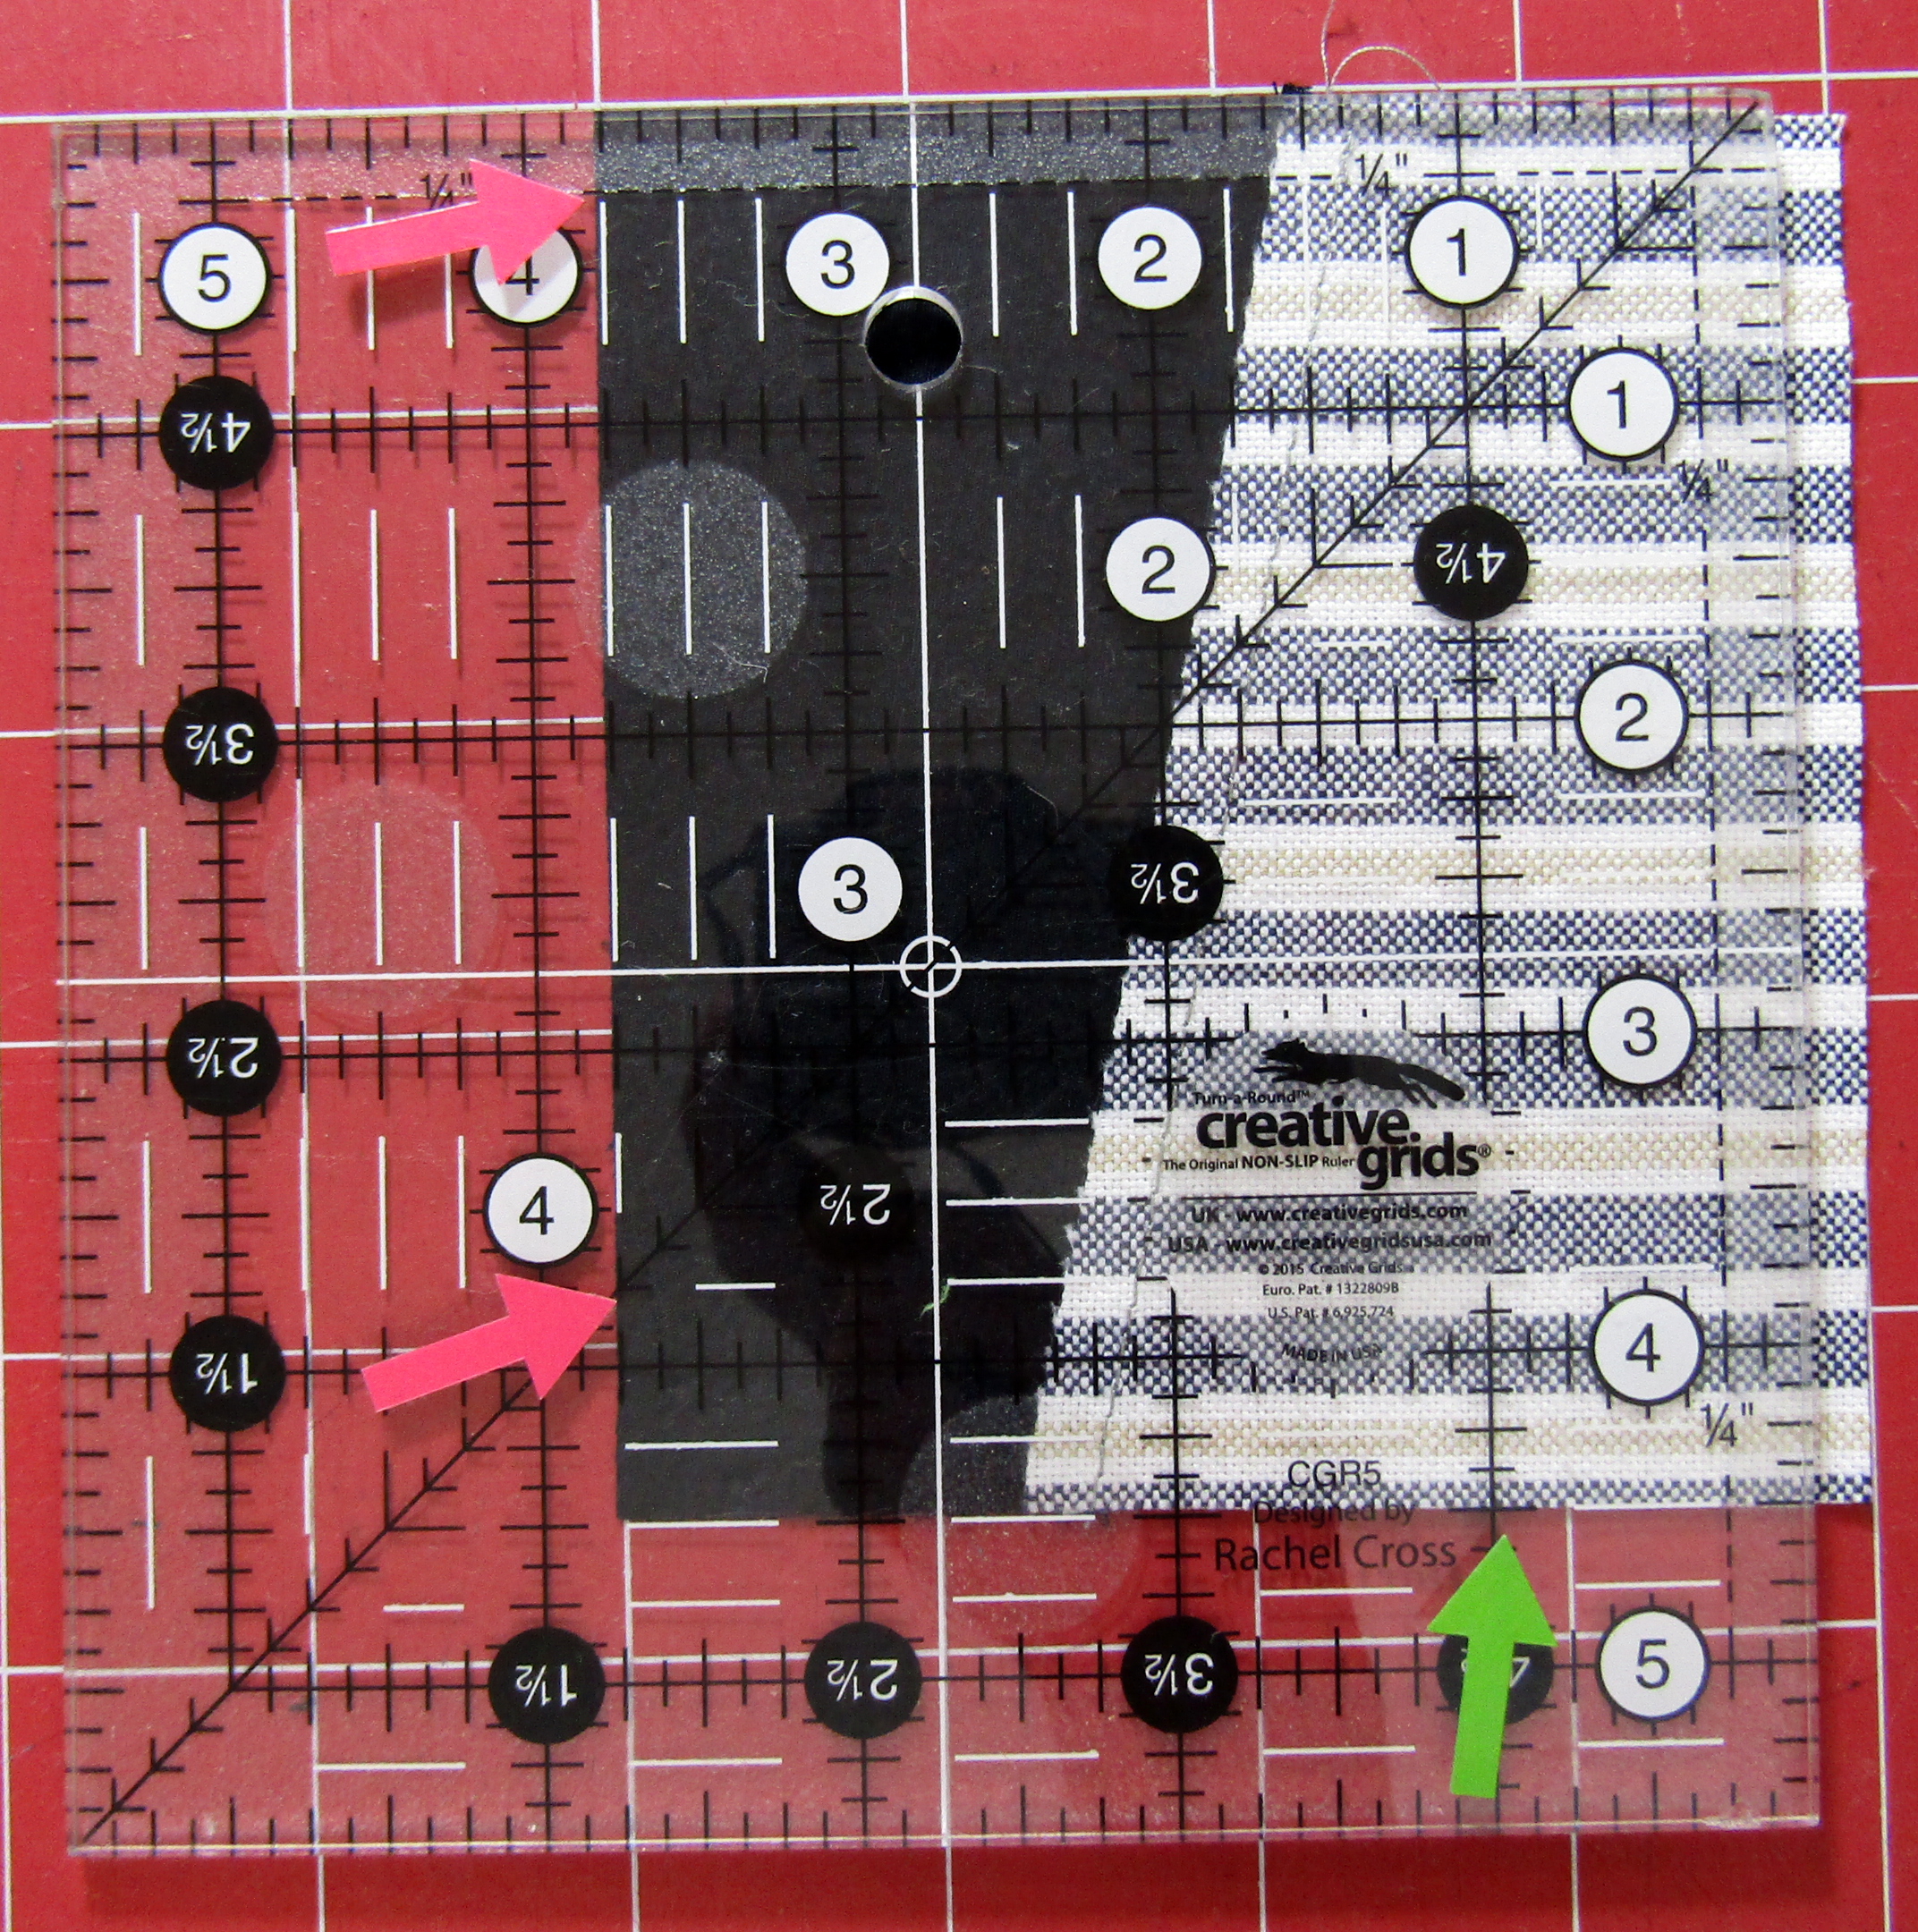
TrimMandible

Sew your 2” square light/gray to your 2″ x 3″ dark rectangle to get a 4 ½” long piece to go between the mandibles. If your mandible blocks are shorter than 4 ½”, just trim this long piece to be the same length, taking a little off both ends as needed to get the right proportion.

Stitch this last strip to the long light edge of a mandible unit, then stitch on the other mandible unit. Take care to make sure when you open everybody up they are oriented this way:

MandibleUnit.JPG

(I noticed these same shapes in Jurassic Park last night.)

Lastly, sew this mandible unit to the front of the body unit to make your completed Patchwork Millennium Falcon! It should measure 8 ½” wide by 11 ½” tall unless your mandibles were a little shorter… This one’s my upcycled one which I *do* really love the striped fabrics in it.

UpcycledMillenialFalcon.JPG

Feel free to send me your questions and comments at jill [at] materiella.com

Check out the patterns I have for sale at my etsy shop: https://www.etsy.com/shop/MateriellaDesigns/

Thanks!
Fastest Seam Ripping in the West!

Did you know a seam ripper could be used this way?!? I had *no* idea until my boss showed me one day a couple years ago at the shop. I used to pick out every 3rd or 4th stitch – So SLOW!! This is so much better when I have to unsew a 90″ seam or something. Obviously, be careful because as with *most* sewing tools, there is some danger, but I haven’t poked myself or ripped any fabric yet. Happy Sewing!


Upcycled Silk Scarf Part II

I finished editing Part Two of my Upcycled Silk Patchwork Scarf videos.  Since we are near the Holidays I’m not adding other links at this time. I also have another upcycled project I will be starting on soon to share so I had to make sure I got this uploaded now!


Silk Patchwork Prep


I’ve basically finished an Upcycled Silk Patchwork Scarf – I can “quilt” or stitch it together a bit more but I have done a good chunk of it.

scarfoutside1.png


Squee! I am so ready for cool weather with this – it’s going to be nice and warm. I used a mix of old ties from my father and husband, a couple second hand store ties, some raw silk remnants from my mother’s stash, and silk decor fabrics I picked up at Goodwill. I tried my hand at video blogging my thoughts and process in prepping for the project here:


Please comment if you have questions about anything. I plan to do another video with further tips and explanations of how I approached this but have to get through the Chaska Quilt Expo next week first. I do have to tell you right now though that it’s a mind-‘splode switching back to quilting cottons after sewing silk on the bias, the cottons are so much more stable! (duh… right?)


Here are a few other “working with ties” or silks videos or blogs I looked at while preppng my own fabrics. Just about everyone has a different approach of course. Surprise, surprise!

These 2 have some great tips, and they have fun!


Beautiful scarf project made from mostly old kimono fabric:


Chatterbox Quilts – no info on washing but great shots.


Harvesting silk ties from mamaka Mills
https://mamakamills.blogspot.com/2011/04/how-to-sew-memory-quilt-using-silk-tie.html


String Block from Ties, they don’t wash first but excellent vid


Memory Quilt using ties


Foundation piecing quilt blocks with old ties on foundation


More about “burn testing” fabrics
https://www.fabricmartfabrics.com/Burn-Test-Chart.html

Making Antelope Canyon Quilt

Quilt Nerd Alert!

AntCynFlimsy
My Antelope Canyon flimsy

The first time I saw Laurie Schifrin’s “Antelope Canyon” quilt I was struck by it. I collected as many photos of it that I could find – which isn’t very many as far as I’m concerned, get your finished quilt photos out there people! – and I marvelled at how the different colorways and value settings change its look. OK, that’s true of most quilts but Antelope Canyon has such GIANT blocks that it really gives you a bold modern graphic, even some optical illusion potential.

When Gruber’s Quilt Shop needed a model of it made – and I just happened to clerk there a few times a week – I signed up for it. They have the version for the “Texture Graphix” line of fabrics by Jason Yenter for In the Beginning fabrics. I am spelling that all out for you because I just helped open and shelve a *new* line of Texture Graphix by Jason Yenter in starker whites, blacks, and greys and they would ALSO make a great Antelope Canyon quilt! or any quilt – they’re just gorgeous.  Of course, Laurie Schifrin’s already done another cool strippy design called “Mirage” and you can see it at that link too. And truly I don’t mean to sound like an advert, I just try to share all the details since sometimes a quilt maker wants *exactly the fabric* or pattern or whatever but doesn’t know the name.

If you’re still working on an Antelope Canyon quilt or plan to, here are my few tips:

  • Label your pieces yes but just as importantly, to me, is underline *any* letter that could be mistaken for another letter upside down or sideways, this way you know which way is up for that letter. Pictured below is L and M, not 7 and W, or L and W. But *do not* let your masking tape (if that’s what you use) get onto the edge like my L tag here – it will make the fabric fray more than it might be inclined to. ugh! Do as I say not as I do, OK? Back to the letters, I recommend you underline at least H, I, M, N, P, W, Z. Then put sections of your pieces into plastic baggies or something to protect them until you sew with them. I just stacked mine into sections of the alphabet and then bagged each section and labelled the bag.eAntelopeCynLabelling
  • Check your blocks regularly. It’s easy math with this one: the strips either finish at 1″ or 2″, so add ’em up and then on the outermost round add 1/2″ for your seam allowance. This way you will catch any BIG stitching errors before they get compounded. Here you can see a 4″ check on the middle of a block:AntelopeCyn4InchCHeck The center square plus the first row are looking pretty good in this one. Then my 10″ check starts showing that my seam allowance was getting too big by a thread or two (which was *weird* because in some patterns my scant 1/4″ is too narrow since I use a 1/4″ blade foot for my Pfaff and then can adjust my needle to make it even a bit more scant):AntelopeCyn10InchCheck I did do some unsewing on the blocks a couple of times.
  • Fraying along the way… In my initial pile O’pieces from chain piecing (where I always had my first and last pieces of any given set labelled) you can see that I don’t have much fraying, that’s a pretty good sign that I had the strips squared up decently – or so I thought. PileOPieces Whereas by the time I had my blocks together, I had a fairly hairy back! FrayOnBack Some fabrics are just this way, but also a couple of spots are due to my masking tape hitting the edge. This really isn’t *too* bad (Not like wovens, I love wovens/homespun but talk about fray potential!) but I did try to trim and clean up most of this before giving the flimsy (top) to a long-arm quilter to baste and do some preliminary stitching for me before I do some handquilting. If it really bugs you, you could use some Fray Check on your edges and/or zig-zag baste or serge your edges.
  • Lastly, I did not follow the general instructions to “try to get a good balance of colors and values”. I purposefully tried to get more lights on one side of the block and more dark fabrics on the other. This so far gave me what I see as a little more “movement” on the top:

    AntCynFlimsy
    My Antelope Canyon flimsy

    So does this top look a little more off-balance to you than some other Antelope Canyon quilts? I am hoping to emphasize the “spiral” effect that I see on it with some big stitch quilting.

Tell me if you see what else I did differently than the actual pattern. I will be interested to know who notices!!

(There are still a few kits of this version of the quilt at Gruber’s online store )

I hope this helps some of you out there in the quilting world! Let’s see those Antelope Canyon quilts!

Please visit my pattern shop at https://www.etsy.com/shop/MateriellaDesigns/

Medora and friends

MedoraCover300dp This is my quilt pattern “Medora”. It’s currently written for 2 sizes. I like to play with what I think is a greatly underutilized quilter’s tool for all the things it can do: the Straight Out of Line ruler from Creative Grids (CGRKA3).  It can do basic wedge shapes starting with squares in sizes from 10″ down to 4″, plus it does a “paddle wheel” shape which is basically a twister type block without cutting away so much fabric, and it also does an “optical illusion” cut that is super fun and I have some more plans for that too. Truly the best thing about the tool is teaching it and showing other quilters the many, many blocks you can do with it!

I made a runner pattern with it using the optical illusion cut, Flexible Floe:

FlexibleFloe

…and of course I had to do fun wonky pinwheel quilts with wonky borders:

IMG_0305.jpg

I called it “Twurtle”:

Twurtle

If you like them, you can get any of the patterns by emailing me at jill (at) materiella.com and the ruler by purchasing it from your Local Quilt Shop.

This next pattern is “Paddle Wheel” from Cut Loose Press and you get a really gorgeous result with neutral and blue batiks:

PaddleWheel

As I get back up to speed on WordPress (it’s been a few years for me), I will get more info and links up. Hope you have a lovely weekend – here it will be snowing which means a lot of sewing.